Flourless Chocolate Rum Cake


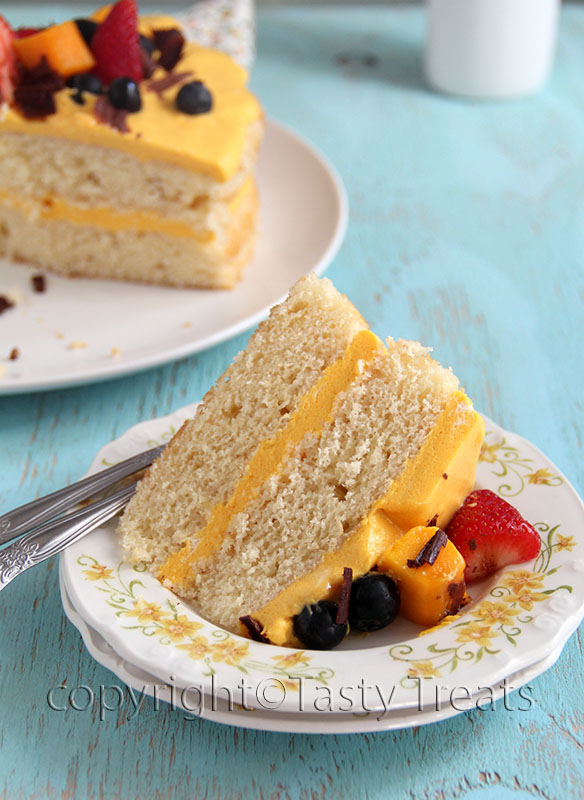
Hope you all had a very Merry Christmas and are eagerly looking forward to welcoming the new year. For the first time in years I did not bake a fruitcake this time. I just wanted something different. And when I saw the recipe for this cake, I new it would be the perfect treat.


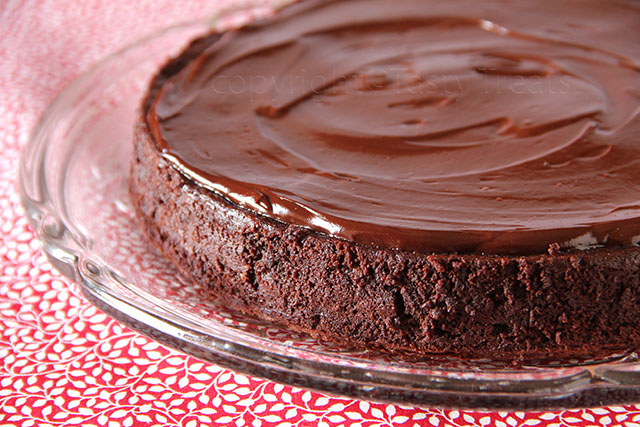
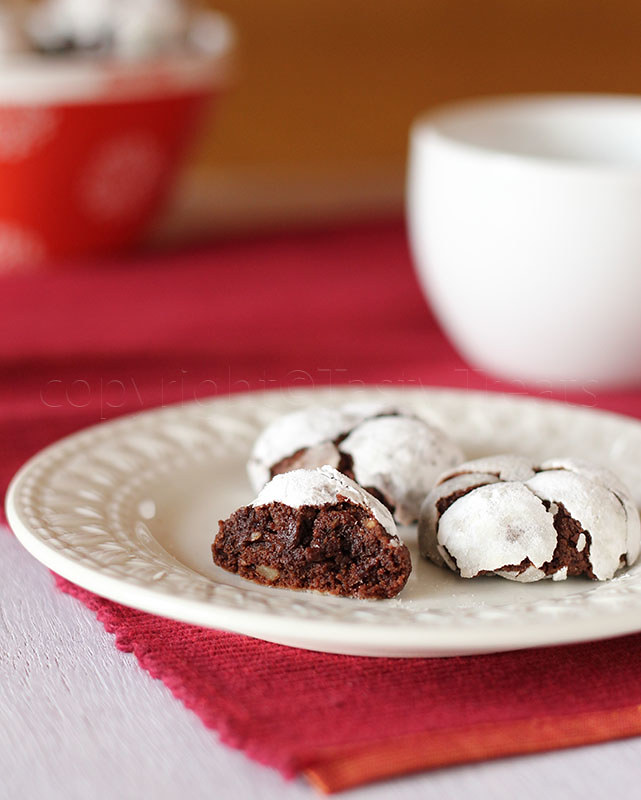
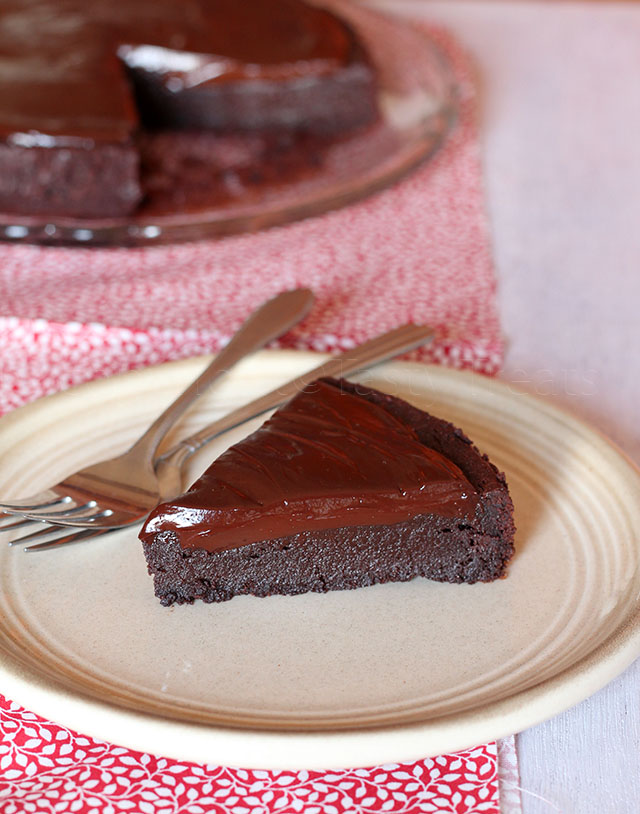
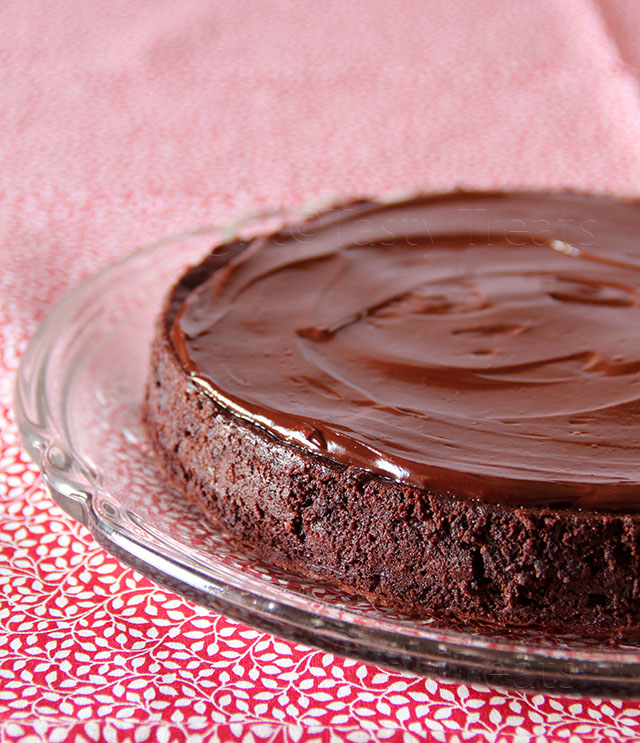
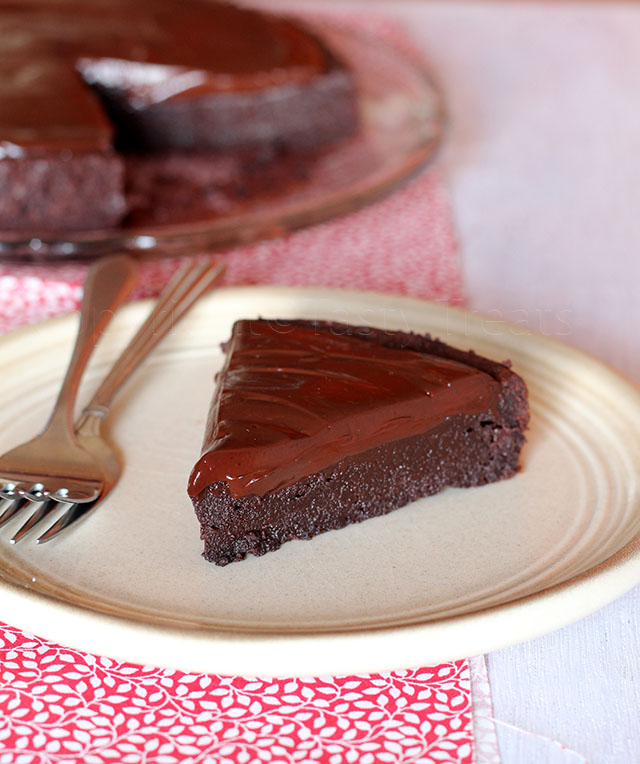
This is one of those amazing, hassle free, one bowl desserts that can be put together in a few minutes and tastes absolutely heavenly. It is amazingly decadent, rich and intensely chocolaty and the rum in the cake takes it to a whole other level.


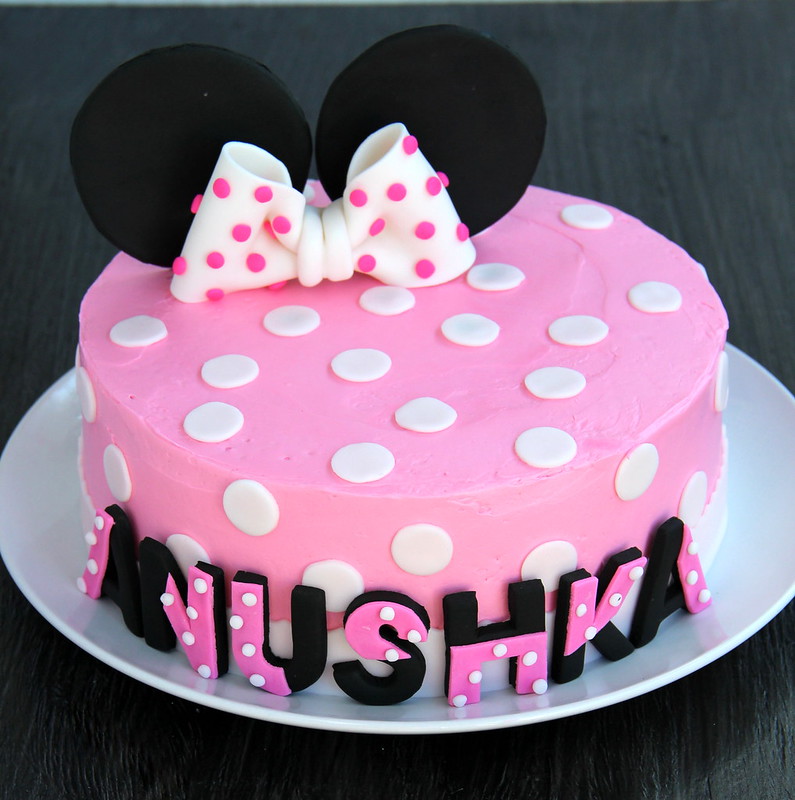
The original recipe has a fudge icing with rum in it. I topped the cake with ganache and skipped adding any rum to it, as I knew Anushka would want to lick the ganache bowl clean:). Moreover as much as I love the flavor of alcohol in desserts, even a little too much makes me tired and sleepy. But if you can take it, I'd say got for it.
To make it alcohol free, simple substitute the rum with some coffee. I can only imagine how good that would be!!
Recipe from Pastry Affair.

Flourless Chocolate Rum Cake


Ingredients:
 6 ounces semi sweet chocolate, chopped
1/2 cup butter
1/2 cup sugar
4 large eggs
1 1/2 tsp vanilla extract
1/2 cup cocoa powder, sifted
1/3 cup rum

Method:
Grease and line an 8" round pan. Preheat oven to 190 C/ 375F.
Melt the chocolate and butter over a double boiler, stirring until smooth. Remove from heat and mix in the sugar. Make sure the mixture is only slightly warm and whisk in the eggs one at a time, mixing well until smooth after each addition.
Stir in the vanilla extract, cocoa powder and rum and mix until smooth. Pour into the prepared pan and bake for 25-30 minutes or until a skewer comes out with a few moist crumbs. Take care to not over bake the cake.
Cool in the pan for 5 minutes and invert onto a platter. Cool completely and top with the ganache.

Ganache


Ingredients:
1/2 cup cream
4 ounce dark chocolate, chopped
1 tbs rum (optional)

Method:
Heat the cream just until you see bubbles around the edges. Pour over the chocolate and let it stand for about 1 minute.
Stir until smooth. Stir in the rum if using and once cool spread over the cake.

Melt 'n' Mix Custard Shortbread


I usually shy away from recipes calling for a lot of butter, but then it is the season for sharing and gifting so why not! These shortbread cookies are an indulgence...soft, buttery, melt-in-your mouth and just lightly sweetened. I also love the flavor of custard powder and the light yellow color it adds to the cookies.
Recipe from here, adapted from The Australian Women's Weekly.

Custard Shortbread


Ingredients:
250gms unsalted butter
35gms icing/ confectioners' sugar
55gms castor sugar
40gms custard powder
360gms all purpose flour
pinch of salt
sugar for sprinkling

Method:
Line and grease a 7"x11" pan. Preheat the oven to 180 C/ 350 F.
Melt the butter over low heat and keep aside to cool slightly.Sift the icing sugar and custard powder into a bowl and mix in the sugar.Add the melted butter and beat mixture until thick and creamy. Add sifted flour and salt and mix gently until combined.
Press the mixture into the prepared pan evenly and level the surface. Mark the dough into fingers and prick each finger decoratively with a fork and sprinkle some sugar on top if desired.
Bake for 25-30 minutes until lightly golden. Cut into fingers while still warm and cool in the pan.
If you like your cookies to be crispier, just bake for another 15 minutes or so.

Chocolate Crinkle Cookies...Holiday Baking


Anushka started school last week and that leaves me with a couple of hours each day to do all those things that are otherwise impossible with an hyperactive kid at home. My to-do list just keeps getting longer and now maybe I could catch up with some of them.


I am also looking forward to bake some more. Now that Christmas is just around the corner, I have the perfect excuse to try some cookie recipes that I've had bookmarked forever. Moreover Anushka is turning out be quite the cookie lover and that's gotten me really excited.
I have made these cookies before and they are an absolute treat. Not only are they pretty to look at, they taste heavenly too. Bake them right and they are amazingly fudgy and chocolaty, like the perfect brownie. What I love about this recipe is that there is no butter involved and the ingredients have to be just mixed quickly in one bowl and the dough tastes amazing too.


The one change I made was to use substitute some of the bittersweet chocolate with unsweetened chocolate as I remember finding them a little too sweet for my tastes. With this change though they were just right. Recipe from here.

Chocolate Crinkle Cookies


Ingredients:
1 cup bittersweet chocolate, chopped (I used 1/3 cup unsweetened chocolate)
1 cup brown sugar, packed
1/3 cup oil
2 eggs
1 tsp vanilla extract
1 cup flour
1 tsp baking powder
1/4 tsp salt
1/2 cup walnuts, chopped (optional, but highly recommended
1/2 cup powdered sugar

Method:
Melt the chocolate over a double boiler. 
Add the sugar and oil and mix well.
Make sure that the mixture is almost at room temperature and add the eggs one at a time, whisking well after after each addition.
Add the vanilla.
Combine flour, baking powder and salt. Add to the chocolate mixture. Stir in nuts.
Cover and chill the dough for two hours or until firm enough to roll.Preheat the oven to 175C /350F.
Form into 1" balls and roll in the powdered sugar until completely coated. 
Place in a parchment covered cookie sheet about an inch apart and bake for 8-10 minutes.
Cool on wire racks. 
I baked my cookies for 8 minutes, they will be soft when you get them out of the oven, but wait for  a few seconds and they will be firm enough to transfer them to the rack and will get firmer when completely cool.
Please, do not overbake the cookies. They look the best on the day they are baked, but they taste just as great for a couple of days more.

Maharashtrian Chakli....Spiced Murukku


Murukku was one of the first snacks mom would make for Diwali. It was and still is everyone's favorite. She would make a lot and after saving some to be shared with neighbors on the actual day, the rest was always kept within our reach and we would always have one in our hands as we played and enjoyed our Diwali holidays. No matter how much she made it would all be gone in a few days.
I have always made the traditional salted one (recipe here), so this time for a change I made the more spiced mixed flour maharashtrian version. The recipe is from an old Femina Cookbook, that I had saved from years ago. The chaklis turned out great, they were easy to shape and I loved the spice and the flavor of gram flour.

Maharashtrian Chakli


Ingredients:
2 cups (400 gms) rice
1 cup (200 gms) urad dal
1 cup (200 gms) chana dal
2 tbs (30 gms) moong dal
45 ml oil for mixing the dough

1 tbs (15 gms) ajwain
1 tbs red chili powder (adjust to taste)
1 tbs (15 gms) sesame seeds
1/4 tsp turmeric powder
salt to taste
oil for frying

Method:
Roast the rice, urad dal, chana dal and moong dal separately until crisp. Grind together to a fine flour.
Stir in the ajwain, sesame seeds, chili powder, turmeric powder and salt. Add the oil and mix well, then add enough water to form a smooth but firm dough.
Fill the chakli mould with some dough and press out chakli's on paper. Fry them in hot oil on medium heat until golden and crisp. Drain on paper towels and when completely cool store in air-tight containers.

Easy Mava Peda


Diwali is just around the corner and this year it's extra special. I am at home for Diwali after seven years and am really looking forward to all the celebrations. It is going to be Anushka's first Diwali in India and I want her to experience everything we did as kids.
I am going to take her shopping for lamps and lanterns this weekend and she is so looking forward to all the fireworks. I promised to get her sparklers and I was surprised as to how well she remembers them from last year.
What I look forward to the most are the many varieties of homemade snacks and sweets to munch on throughout the day. Amma and I plan to make all our favorites like Rava Laddoo, Besan Laddoo, Ribbon Pakoda and Murrukku next week. While going through my old recipe books I found this page that I had torn out of an old Femina magazine with a recipe for a Burfi. The instructions seemed a little weird, so I used the ingredients and came up with this peda instead.
I love milk based sweets and these mildly sweetened, cardamom spiced pedas were just perfect. Nothing makes me happier now than Anushka asking for seconds and this time she did, again and again.

Here are some more popular Diwali Sweets and Snacks...
Rava Laddoo
Mawa Rava Coconut Laddoo
Besan Laddoo
Kaju Katli/ Cashewnut Fudge
Shankarpali
Ribbon Pakoda
Murrukku

Easy Mava Peda


Ingredients:
150 gms fresh paneer, rinsed well and drained (made from 1lt full cream milk)
100 gms fresh mawa (made from 500mls full cream milk
1/4 tsp cardamom powder
5 tbs sugar
a little ghee
finely chopped nuts for garnish (I used pistachios)

Method:
Knead the paneer for a minutes until soft. Add the sugar and cardamom powder and knead for a couple of minutes until well combined.
Transfer the mixture into a heavy bottom pan and cook on low heat for a few minutes until the sugar dissolves and the raw smell of paneer is gone. Stir in the mava until well combined. Cook on low heat stirring continuously for a few minutes until the mixture comes together. Ensure that the mixture does not burn or become dry.
When still warm, grease your hands with a little ghee. Take small portions and shape as desired. Garnish with chopped nuts.
Store in an air-tight box in the fridge for upto 4 days. It tastes best when kept out for about 15 minutes before eating.

Healthy Cardamom Tea Cake


It has been a month since we moved back to India. There are hundreds of things I will miss about our life back in the US, but it's wonderful to be home and meet up with family and friends. Most of all I love to see Anushka playing with and getting pampered by her grandparents. We are undecided as to where we will be settling and I've been shuttling between by in-laws and parents homes and living out of suitcases and it still feels like a vacation.
As far as blogging goes though, I'm in a rut and it took a lot of self-motivation to write up this post. I miss my boards and all the props that I had to leave behind and of course the huge oven in our apartment. Although I haven't cooked anything new in a while I have been baking quiet a lot and am finally getting used to the old O.T.G at my mom's place.


This cake, adapted from Cook Republic is the first one I baked since coming here. I love the simple ingredients and the one bowl mixing method. The batter was ready in no time and while the cake bakes, the house smells heavenly because of the cardamom. It was impossible to wait until the cake cooled and we sliced it minutes after it was out of the oven. It had just the right amount of sweetness, great texture and amazing flavor, we loved it.

Healthy Cardamom Teacake


Ingredients:
1 1/2 cups self-raising flour
1/2 whole wheat flour
1 1/2 tsp cardamom powder
1/4 tsp cinnamon powder
a pinch of salt
1 cup castor sugar
3 eggs, well beaten
1 cup rice bran oil
1/2 cup milk
icing sugar, for dusting (optional)

Method:
Preheat oven to 350F / 180C. Liberally grease an 8" round pan and dust with flour.
Sift together flours, cardamom, cinnamom and salt.
Stir in sugar. Whisk together the eggs, oil and milk until combined. Spoon mixture into prepared pan.
Bake for 40-50 minutes until golden and cooked through.
Turn out onto a wire rack to cool, dust with icing sugar, if using and serve.

Cold-Oven Cream Cheese Pound Cake


We were cutting a melon for our snack last evening, while craving for a good slice of cake instead and we got around reminiscing about those days when we wouldn't give a damn about what we ate. We were in Hyderabad for a year after we got married, it was a new place with not many friends. Once Manoj left for work my brand new oven was the best company I had on most days. I baked cakes or muffins every other day and while I loved sharing my bakes with my new neighbors, there were those rare occasions when I would finish an entire cake all by myself and then I would bake one more before Manoj got home. We always had cake at home and we never gave a thought to all the sugar, flour and butter we were having daily.


Ofcourse now its all I can think about as the side effects are a little too clearly visible around our waistlines. 
I eagerly wait for an opportunity to bake now, friends coming over or a party at Anushka's school or at work. I had baked this particular cake for a snack party at Anushka's school a while back and it was heavenly. The cream cheese imparts an amazing velvety texture to the cake and a little tanginess that's just perfect.
It's from one of my favorite books, Cake Keeper Cakes by Lauren Chattman. I googled the recipe before I tried it and it was a good thing too because I found a lot of  reviews that suggested reducing the sugar. I reduced it considerably and it was still sweet, but just the right amount.
Note:
I divided the cake batter among two loaf pans and there was not enough and thats the reason it baked flat. Its best to use a bundt pan, it rises beautifully and looks great.

Cold - Oven Cream Cheese Pound Cake


Ingredients:
3 cups cake flour
1 1/2 tsp baking powder
1 tsp salt
1 cup (2 sticks) unsalted butter, softened
8 oz cream cheese, softened
1 1/2 cups sugar (original recipe calls for 2 1/2 cups)
6 eggs (room temperature)
1 tbs pure vanilla extract
1 1/2 tbs grated fresh ginger
1 tbs grated lemon zest


Method:
Adjust the oven rack to the lower-middle position. Grease a 12-cup bundt pan and dust with flour. Combine flour, baking powder and salt in a medium mixing bowl.
Combine the butter, cream cheese and sugar in a large mixing bowl and cream with an electric mixer on medium high speed until fluffy, about 3 minutes, scraping down the sides of the bowl if necessary.
With the mixer on medium speed, add the eggs one at a time, scraping down the sides of the bowl after each addition. Beat in the vanilla, ginger and lemon zest.
Turn the mixer to low speed and add the flour mixture, 1/2 cup at a time, scraping down the sides of the bowl after each addition. After the last addition, mix for 30 seconds on medium speed.
Place the cake in a cold oven. Turn the oven to 325F and bake, without opening the door, until the cake is golden brown and a toothpick inserted in the center comes out clean, 65-80 minutes.
Cool the cake in the pan for 15 minutes, then invert it onto rack. Cool completely before slicing and serving.
Store uneaten cake in a cake keeper, or wrapped in plastic at room temperature for upto 3 days.

Note:
I divided the cake batter among two loaf pans and there was not enough and thats the reason it baked flat. Its best to use a bundt pan, it rises beautifully and looks great or use smaller loaf pans.

Eggless Chocolate Mango Marble Cake


Chocolate and mango are on the top of my list of favorite flavors and they pair up beautifully too. This was the second dish we baked as part of the Homebaker's Challenge and the recipe was chosen by Sangeetha of Spicy Treats.


We had two recipes to chose from, with or without eggs and I went eggless this time. I usually prefer baking with eggs but this recipe did not disappoint. The cake was moist and the  two flavors really stood out. Like most eggless cakes this one too had a dense crumb, but the taste more that compensated for it.
The only change I made was adding a little bit of coffee to the chocolate batter and that really helped to enhance the chocolate flavor.

Chocolate Mango Marble Loaf


Ingredients:
2 cups all purpose flour
11/2 tsps baking powder
1/2 tsp baking soda
1/4 tsp salt
1/4 cup cocoa powder
3/4 cup sugar
5 tbsp oil
1 tsp vanilla extract
1 cup mango pulp
1/4 milk
1/4 cup buttermilk

Method:
Preheat the oven to 350F/ 180C. Grease and line a 9" x 5" loaf pan.
Mix the cocoa powder with 3-4 tbs of warm water and keep aside.
In a large bowl whisk together flour, baking powder, baking soda and salt until well combined.
In another bowl mix together the sugar, oil, vanilla, mango pulp, milk and buttermilk.
Add the wet mixture to the dry ingredients and fold gently until well combined.
Divide the batter into two and gently fold in the cocoa mixture into one half.
Pour the two batters alternately into the prepared pan and run a knife through the batter to create a marbled effect.
Bake for 50 - 55 minutes or until done.

Pizza from Scratch with Onions, Bell Pepper, Chicken Sausage and Corn


It is so surprising that I've never posted a pizza recipe here, because it's something we make so regularly. Although we love eating out, when it comes to pizza especially, home made is just so much better.


I love experimenting with different crusts, sauces and toppings, there are so many options. The crusts don't always turn out perfect, but cheese (just like chocolate), makes makes everything taste good.


Home Bakers Challenge is a new group started by Priya of Priya's Versatile Recipes and we all baked Pizza  for our first challenge.The recipe below is by Giada Laurentis and the only change I made was substitute half the flour with wheat flour. The crust baked perfectly and it had great texture and was not at all soggy. Went along with a simple marinara sauce and some of our favorite toppings and cheeses. 

Pizza from Scratch


Dough:
Ingredients:
1/2 cup warm water (105-110 degrees F)
2 tsps active dry yeast
1 cup all purpose flour
1 cup whole wheat flour
1 tsp salt
3 tbs olive oil

Pizza Sauce ( I used the marinara sauce that I make often, recipe here )
Cheese, Mozzarella and Sharp Cheddar

Toppings I used:
Onion
Capsicum
Chicken Sausage
Corn kernels

Method:
Mix the warm water and yeast in a small bowl and let stand for about 5 minutes until the yeast dissolves.
Mix the flour and salt in a bowl. Add the olive oil and stir it in with your fingers. Add the yeast mixture and mix until the dough comes together.
Turn out into a lightly floured surface and knead for couple of minutes until smooth.
Transfer the dough to a large oiled bowl and turn the dough to coat with oil. Cover the bowl with a plastic wrap and set aside in a warm area until it doubles in volume, about an hour.
Punch the dough and divide into two equal balls.( Use the dough immediately or store refrigerated in an air-tight container for one day).
Preheat oven to 450 degrees F. Keep your pizza stone or a rimless baking sheet inside the oven as it preheats. Sprinkle cornmeal over a piece of parchment paper. Place the dough on the parchment paper and roll out or spread the dough with your fingers to your desired thickness, I like a thin crust pizza.
Brush the dough lightly with some olive oil.
Spread some pizza sauce over the dough and then sprinkle the cheese over the sauce, as much as you like.
Top with your favorite toppings and sprinkle some oregano and chili flakes and salt.
Take the pizza stone or baking sheet out of the oven and transfer the pizza along with the parchment paper onto it.
Bake the pizza until the crusts are crisp and brown on the bottom and the cheese has melted and is bubbly.


Mango Strawberry Carrot Smoothie


I have been making smoothies everyday for the last couple of years. Anushka and I, have a smoothie daily for our  mid morning snack and it's the only thing she will have without a fuss.

Smoothies are the perfect way to include a good serving of fruits and vegetables in your daily diet, especially for kids. They are healthy, refreshing and so filling. Use ripe, sweet fruits and fresh vegetables and mix and match them to get various flavors, colors and textures. Makes a wonderful healthy dessert too.


I always try to add vegetables to my smoothies, about a third of the amount of fruits. I have tried a lot of combinations and this is one of my favorites. Use tender sweet carrots and sweet mangoes and strawberries and you'll have a great tasting drink.

Mango Strawberry Carrot Smoothie


Ingredients:
pulp of two mangoes
8 strawberries, hulled and chopped
1 big carrot, washed and peeled and chopped
1/2 cup plain yogurt
sugar/honey/ any other sweetener as needed (I usually avoid this)
cold water as needed

Method:
Take all the ingredients in a blender and blend until smooth. Add sugar if needed and add enough water to get the required consistency and blend again. Serve immediately.

Mango Cream Cake


It was Manoj's birthday yesterday, time for yet another celebration. Though the day went by as usual, we had a few friends over for dinner. I cooked a simple meal and of course there was cake for dessert.
The last cakes I baked were for Anushka's birthday and there were a lot of sleepless nights and fussing and swearing involved, so when I asked Manoj what kind of cake he wanted, the only thing he asked was to keep it simple :).
Mangoes are everywhere now and the ones I bought this weekend were so juicy and sweet, they seemed perfect for a cake. I decided to stay away from spatulas and icing bags and to just keep things really simple. Once the layers were baked and cooled, it just took a few minutes and the cake was ready and I loved the way it looked.
I have been looking for a good vanilla cake recipe to use with such cream cakes, one that uses oil so that its moist even straight out of the fridge and one that's not too sweet. I did not find one so I tried out this cream cake from Sky High. It uses heavy cream instead of butter, it's light and it's delicious and so moist, just what I was looking for. This recipe makes three layers, but I used only two. If using all the three layers, you will have to make some more of the filling, just double or increase the quantities by 50%.

Mango Cream Cake


Cake:
Ingredients:
1 3/4 cups cake flour
3 3/4 tsps baking powder
1/2 tsp salt
1 cup heavy cream
2 tsps vanilla extract
1 1/4 cups sugar (I used 1 1/8 cups)
2 whole eggs
2 egg yolk
3 tbs buttermilk

Method:
Grease and line three 8" pans with parchment paper.
Preheat the oven to 180 degrees C/ 350 degrees F.
Sift the flour, baking powder and salt together and keep aside.
Combine the cream and vanilla in a large bowl and whip until soft peaks begin to form.
Reduce the speed gradually to low and beat in the sugar, but do not whip until stiff.
Add the whole eggs and egg yolks and whip until the batter forms soft peaks.
Sift about a third of the dry ingredients over the batter and fold in by hand. Repeat 2 more times until all of the flour mixture has been added. Finally fold in the buttermilk.
Divide the batter among the three pans. 
Bake the cake layers for 18-20 minutes, or until a toothpick inserted in the center comes out clean.
Allow the cakes to cool in the pan for 10 minutes, then invert them onto wire racks. Carefully peel of the parchment paper and allow to cool completely.

Sugar Syrup
Ingredients:
2 tbs sugar
1/2 cup water

Method:
Heat the sugar and water until the sugar has dissolved. Keep aside to cool.


Mango Cream
Ingredients:
1 tbs water
1 1/2 tsps gelatin
1 cup mango puree
1/2 cup heavy whipping cream
1/2 tsp vanilla extract
2 - 4 tbs sugar, as needed depending on the sweetness of the mangoes

Mangoes, Berries and Chocolate Shavings for topping 

Ingredients:
Sprinkle the gelatin over the water and keep aside for 5 minutes for the gelatin to bloom.
Take the cream and vanilla extract in a chilled bowl and sprinkle sugar over it. Whip until it forms stiff peaks.
Heat the gelatin for a few seconds in the microwave or on a double boiler until clear and melted.
Stir the gelatin into the mango puree. Fold in the whipped cream into the mango.
Store in the fridge until the cream thickens and almost sets.

To Assemble the cake:
Level the layers if needed. Brush one cake layer with the sugar syrup until moist.
Spread half of the mango cream over the layer. Moisten the other cake layer with sugar syrup and place on top of the cream. Spread the remaining cream over the cake.
Top with fruits.
Refrigerate covered for a few hours and serve.

Quinoa Fried "Rice" and Chili Fish


A few of us friends met a couple of weeks back and at some point we started discussing and sharing ideas  of the meals we cook regularly. I mentioned Quinoa and none of my friends had ever tasted it and some of them were even reluctant to give it a try. We met again for lunch at my place this week and I made my favorite Quinoa recipe for them. 
I have been cooking with Quinoa for a while now and I've always used it as a substitute for rice whenever I could. Of all the ways I've cooked it, this stir fry is my favorite and a dish I make all the time. Anushka loves it too and its a great way to include a lot vegetables in one meal. 
The chili fish is so easy to make and something I planned at the last minute as an appetizer for our meal. I just went along with what I usually do with chicken and surprisingly it turned out great and it was gone as soon as it was served.

Quinoa "Fried Rice"


(Simple omit chicken and eggs to make it vegetarian)
Ingredients:
1 cup quinoa
2 cups chicken/ vegetable stock or water
2 tbs oil
2 eggs
3 scallions, chopped, whites and greens separated
1 tbs finely chopped ginger and garlic
1-2 green chilies finely chopped
2 heaping cups diced mixed vegetables (carrot, beans, peas, capsicum, broccoli, corn, zucchini)
1 cup cooked chicken, diced
1 tsp fresh ground pepper (add as per your taste)
dash of soy sauce and vinegar (optional)
salt to taste

Method:
Cook the quinoa atleast an hour before making this dish.
Boil the water. Rinse the quinoa and add to the boiling water. Mix, cover, reduce the heat to low and cook for 20 minute. Let sit for 5 minutes and then fluff with a fork, spread out in the pan and cool completely.
Heat 1tsp oil in a wok or other large pan and scramble the two eggs with a little salt and pepper. Remove from pan and keep aside.
Heat the remaining oil in the wok and fry the onion whites, garlic, ginger and green chilies for a few seconds.
Add the diced vegetables and stir fry on high heat for a minute. Add the chicken and fry for another minute.  Add the cooked quinoa, scrambled egg, salt, pepper powder, soy sauce and vinegar and mix well on high heat until heated through.
Garnish with spring onion greens and serve hot.

Chili Fish


Ingredients:
250 gms fish fillet, cut into bite size pieces (I used tilapia)
1 tbs cornflour
2 tsps ginger garlic paste
1/2 tsp pepper powder
1/2 tsp red chili powder
1/4 tsp garam masala
salt to taste
2 tbs beaten egg


2 scallions, chopped fine, white and greens separated
1 tsp finely chopped ginger
1 tsp finely chopped garlic
1/2 tsp pepper powder
1/8 cup chicken/ vegetable stock or water
1 tbs soy sauce
1/4 tsp sugar
dash of siracha/ chili sauce and vinegar
salt to taste


Method:
Mix the cornflour, ginger garlic paste, pepper, red chili powder, garam masala, salt and egg to make a thick paste. Add the fish. Mix well, cover and keep aside for about an hour.
Heat 1 tbs oil in a non stick pan and fry the fish on medium high heat until cooked and browned. Remove from pan onto paper towels.
Add a little more oil to the pan and add the white scallions, ginger and garlic and fry until fragrant. Turn the heat to high and add the stock, soy sauce, sugar, siracha, vinegar and bring to a  boil. Add salt if needed. Add the fish and toss gently to coat with the sauce all over without breaking the fish pieces. Cook for another minute, garnish with scallion greens and serve hot.

The Minnie Mouse Party - Cakes, Decorations and Games


Anushka turned three a few days ago and this year we celebrated her birthday "Minnie Mouse Style"! It was so exciting planning the party, working with all pink and black and getting all the decorations ready. There were a lot of times when I could involve Anushka, especially when there was glue involved and she so enjoyed messing everything up:)

Then of course there were the cakes and lots of them...(Links to the recipes below the pictures)


Chocolate cake filled with Strawberry Whipped Cream and frosted with SMB

Vanilla Chiffon Cake with Strawberry Cream filling and SMB frosting

I love tall cakes and attempted a tiered one this time, my first! I kept the top tier short though or else we would have ended up with too much cake. The Minnie Mouse figurines gave me a few sleepless nights, it was not easy getting the face right and I was so relieved when I was done. All in all we had two fun evenings with friends and I still cannot believe that it's been 3 years!!
Just sharing a few more pictures and details from the parties....

Welcome sign on the door...


The banner was designed in paint and then printed and cut into shape. The number 3 is cut out of stiff felt and I glued some pink tissue flowers on it.

Made this out of paper pinwheels, my favorite thing!


I made these Minnie Mouse Ears kind of following the tutorial here. But I took the easy way out and bought black plastic hairbands. I used stiff black felt with the sticker on the back, so all I had to do was cut the ears using this template and then wrap them around the band and stick them together. They were very stiff and stood up straight. I made the bows and hot glued them on the bands. Anushka loved these and still wears them all the time.

Here is a great game for a Minnie mouse party...


The blind-folded birthday girl pinning her bow...


Last but my favorite...the pinata, I was so happy with the way it turned out and the kids always love it. I got the idea from here but made it a pull string one. It's perfect for kids this age especially if you're having an indoor party.


"I want to pull"...the birthday girl goes first and I had my fingers crossed the whole time praying all the kids get a turn.


It was an amazing experience planing the party and Anushka had a great time. Here's the exhausted birthday girl with her favorite gifts...