Showing posts with label Snacks. Show all posts

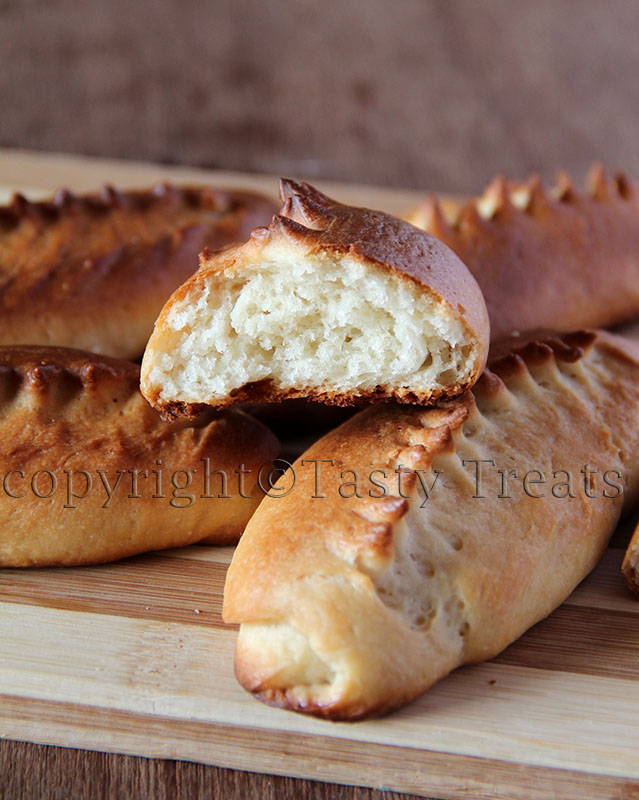
Petit Pains Au Lait (Milk Breads) - We Knead to Bake # 17


The bread for this month for the We Knead to Bake group chosen by Aparna is a simple but classic french bread. Petit pain au lait means little milk breads/ rolls. The rolls are mildly sweet and they bake to a beautiful golden brown. They are slightly rich and are soft and almost flaky on the inside because of the way they are shaped and rolled.


This is a wonderful and very easy recipe making it perfect for beginners. I stuffed about four rolls with some chocolate and left the others plain. All of us at home preferred the plain ones and I will surely be baking these again.
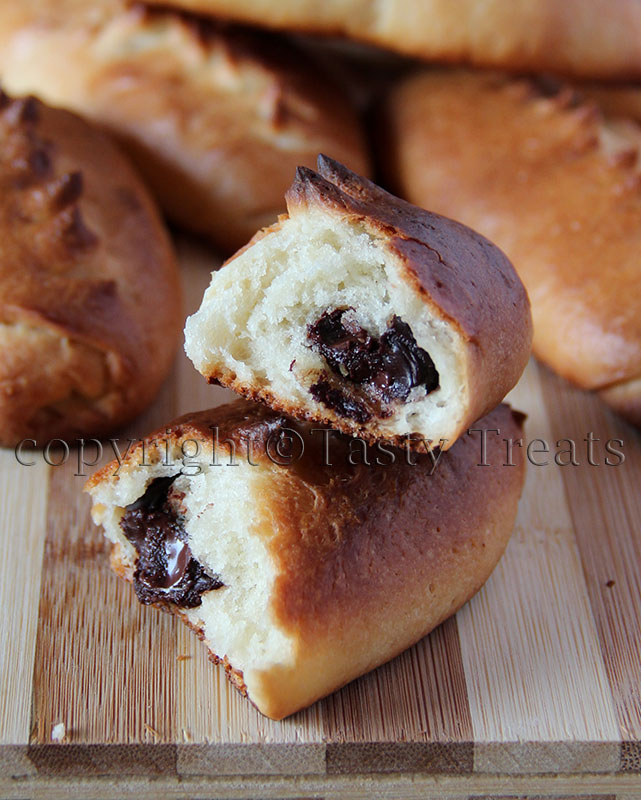
Do take a look at these videos to get an idea of how the bread is cut to create the pattern. Link1/ Link2.
Recipe adapted from Gourmet by Kat

Petit Pains Au Lait


Ingredients:
2/3 cup warm whole milk (plus a few teaspoons more if needed)
1 tsp instant yeast
1/4 cup sugar
1 2/3 cup all-purpose flour
3/4 cup bread flour*
1/4 tsp salt
60 gms butter, soft at room temperature
extra milk for brushing

Method:
*If you don’t have bread flour, put 2/3 tsp vital wheat gluten in your 3/4 cup measure and top up with all-purpose flour. Mix this well. 
Or if you don’t have vital wheat gluten, then just use 3/4 cup all-purpose flour.
**This topping is optional. The pearl sugar looks pretty and adds a little crunch. If you can’t find pearl sugar, use large crystals of sugar or even regular granulated sugar. 
I used my stand mixer to knead the dough, you can also use the food processor or knead by hand. Put the warm milk, yeast and sugar in the bowl. Mix on low speed. Then add all the flour and the salt and mix until the mixture looks crumbly. Add the butter and knead until you have a soft, smooth and elastic dough that’s not sticky. Add a little more milk (in teaspoonful at a time), if your dough is dry, until you have the required consistency of dough.
Shape the dough into a ball and place it in an oiled bowl. Turn it over to coat with oil. Cover loosely and set aside to rise until double in volume, about 1 1/2 hours. Turn the dough out onto a clean surface. The dough will be easy to work with and not sticky, but if needed, just lightly dust your palms with flour. Deflate the dough gently, and divide it into 10 equal pieces. Let them rest for 15 minutes.
Roll out each piece of dough, one at a time, into a circle of about 4” in diameter. Slowly roll up the circle from one end, Swiss roll/ jelly roll style into a cylinder. Pinch the seam closed neatly, and place them on a greased or parchment lined baking sheet with the seam side facing down. Cover loosely and let them rise for an hour or so till almost double in size.
Brush them lightly with milk and using a pair of sharp scissors, make diagonal cuts (not too deep) on the top of the rolls. Sprinkle pearl sugar/ granulated sugar. Bake them at 200C / 400F  for about 15 minutes or so until they’re golden brown. Cool on a wire rack and serve them warm or at room temperature.
This recipe makes 10 Petit Pains au Lait. They’re best eaten the same day, though you could warm them up and serve the next day.


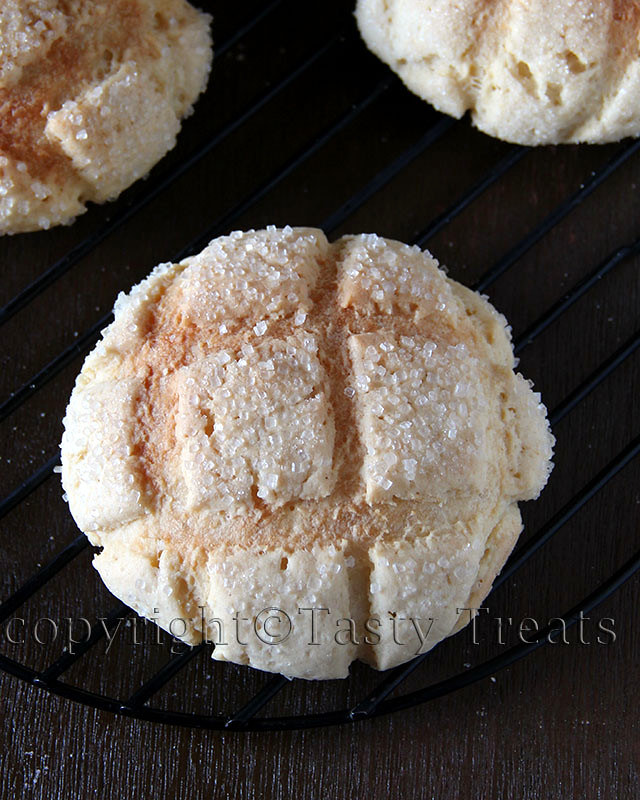
Melon Pan - We Knead to Bake # 15


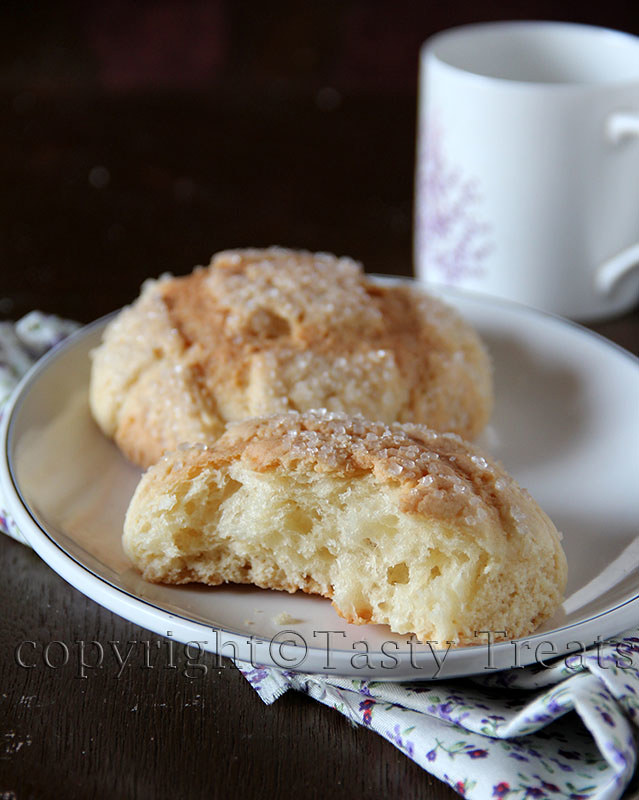
Melon Pan is a Japanese sweet bread. These soft spongy mildly sweetened buns have a crunchy cookie layer on the top and the two textures is what makes them really special and unique. 
I love how attractive they look and they were just as delicious.
The ingredient list and the method maybe long but the bread was really easy to make and it is totally worth the effort. And here's a link to a very helpful video of how this bread is made.

Thanks to Aparna for choosing this wonderful bread for the We Knead to Bake group

Melon Pan


For an eggless recipe just substitute the egg with 1 tbs yogurt or milk.
Ingredients:
For the bread dough:
1 3/4 cups all-purpose flour
2 tbs milk powder
1 tsp instant yeast
1/2 tsp salt
1/3 cup cold water
1 egg, beaten 
1 tbs sugar
25 gms butter

For the cookie dough:
1/3 cups all-purpose flour
3/4 tsp baking powder
a large pinch of salt
60 gms butter, at room temperature
1/4 cup castor sugar
1 large egg
1/2 tsp vanilla extract
1 tsp lemon zest
castor sugar/ granulated sugar for dusting

Method:
Bread Dough
Whisk together flour, powdered milk, yeast, and salt in the bowl of your stand mixer or in any large bowl. In another bowl, beat the egg and cold water together with a fork until well blended. Add this to the flour mixture in the bowl.
Using the dough hook, knead on low speed until it all comes together as a dough and then on medium speed until you have a somewhat stiff dough. Add the sugar and again knead well.
Now add the butter and knead (first at slow speed and then on medium) until the butter is completely incorporated into the dough and the dough becomes smooth and elastic. The dough should be well-kneaded to develop the gluten.
Shape the dough into a round, and place it in a lightly oiled bowl. Cover and let it rise until doubled (about an hour or so).
Cookie dough
Cream the butter and sugar until light and fluffy. Add the egg and vanilla extract and beat till combined. Whisk together the flour, baking powder and salt and add this to the bowl. Also add the lemon zest. Beat together  just until combined.
Shape the dough into a cylinder  and wrap tightly in cling film. Refrigerate the dough until required.
Bread dough
Once the dough has doubled in volume, take it out onto a lightly floured work surface. Lightly grease your baking sheet or line it with parchment. Deflate the dough gently and divide it into 8 equal portions.
Shape each portion into a smooth ball. Work with one portion and keep the others covered so they don’t dry out.
Take the cold cookie dough and slice the cylinder into 8 equal portions. Use two pieces of plastic sheets or cling film to flatten the cookie dough. Place one slice/ round of cookie dough on a piece of plastic sheet/ cling film. Cover with another piece, and using a flat bottomed pan, press down on the dough to flatten it, until it is reasonably thin but not very much so.
Carefully take a ball of bread dough (it will have puffed up a little so don’t deflate it), and place the circle of cookie dough on top of it. Gently press the cookie dough edge to the bread dough ball so that it covers the top and sides of the ball, but leave the bottom open. Gently, holding the covered bread dough by the underside, press it into some sugar. Then using a the blunt side of a knife, mark the top of the cookie dough side of the bread roll with a diamond pattern. The pattern should be deep enough (otherwise it will disappear when the bread rises and bakes) without cutting through the cookie dough layer into the bread.
Place this on the greased or parchment lined baking sheet. Repeat this with the remaining cookie dough and bread dough balls. Let them rise for an hour.
Bake them at 180C (350F) for about 25 minutes, until the tops of the Melon Pan just start turning brown. Transfer to a wire rack to cool thoroughly.
Melon Pan are best eaten the day they are made.

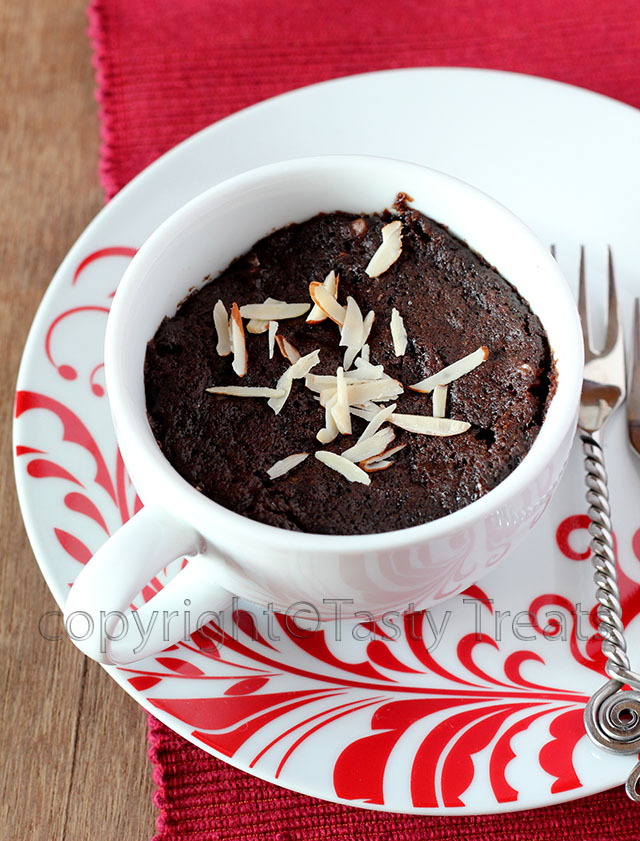
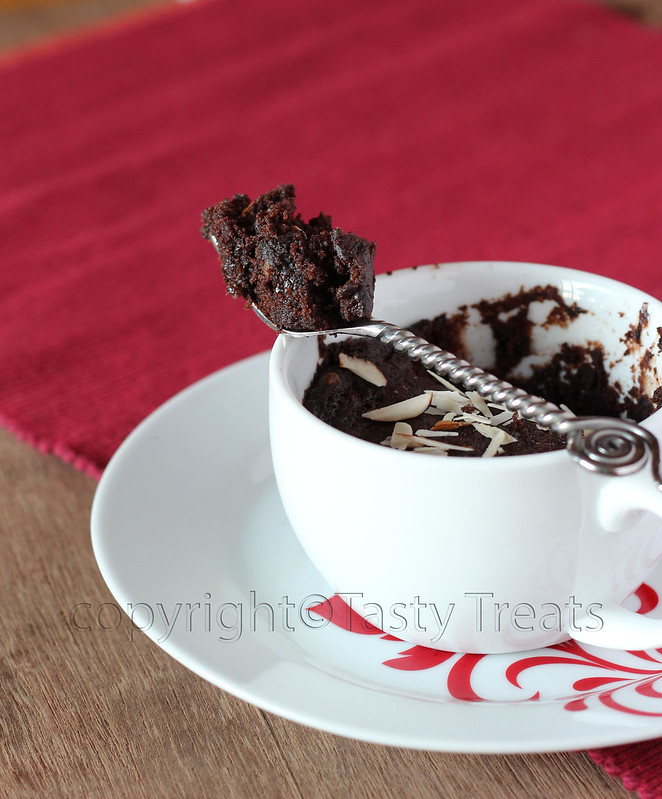
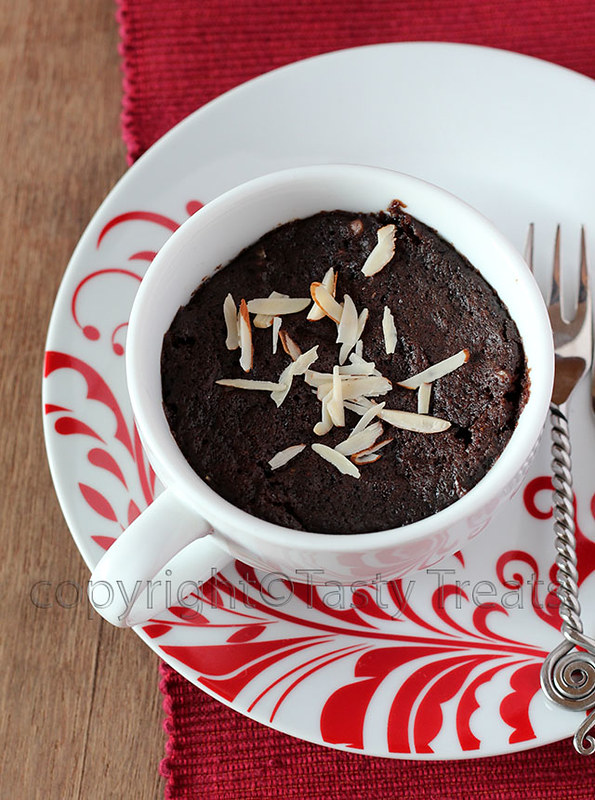
50 Second Eggless Chocolate Mug Cake


Happy Valentine's Day to all! For the last several years I've have always baked a chocolate cake for this day, but this year with Manoj being out of town, the cake plans have been postponed to another day. But again it is impossible to ignore all the chocolate treats that I have been seeing everywhere and what's better at such times than this super easy chocolate mug cake. I have made this so many times, it is just the thing to satisfy all those sudden, irrational and odd time cravings for chocolate cake.

If you are looking for an easy last minute dessert to round up your valentine's day meal or for any other time then this could be it. The cake is moist, chocolaty and uses just basic simple ingredients. You can make it extra special by serving it with a dollop of whipped cream or ice-cream or drizzling or even pouring as much chocolate sauce as you like. Some ganache would be great too.

The only thing to take care is to not overcook the cake. In the microwave a few seconds here or there could make a big difference. 48-50 seconds is what it takes in my microwave works perfectly in mine, make sure to check.

Eggless Chocolate Mug Cake


Ingredients:
3 tbs all purpose flour/ maida
1 tbs cocoa
1 1/2 tbs castor sugar/ super fine sugar
1/4 tsp instant coffee powder
1/8 tsp baking soda
1 tbs finely chopped nuts (I used walnuts)
2 tbs chopped dark chocolate
1 1/2 tbs water
1 1/2 tbs oil
1/2 tsp vinegar
1 tsp vanilla

Method:
Whisk together flour, cocoa, sugar, coffee powder, baking soda. Add the chopped nuts and chocolate and mix. In another bowl whisk the water, oil, vinegar and vanilla until combined. Pour the wet mixture over the flour and whisk gently just until combined. Spoon the mixture into a microwave safe mug and microwave for 50 seconds. 
Cool for a few seconds and enjoy!

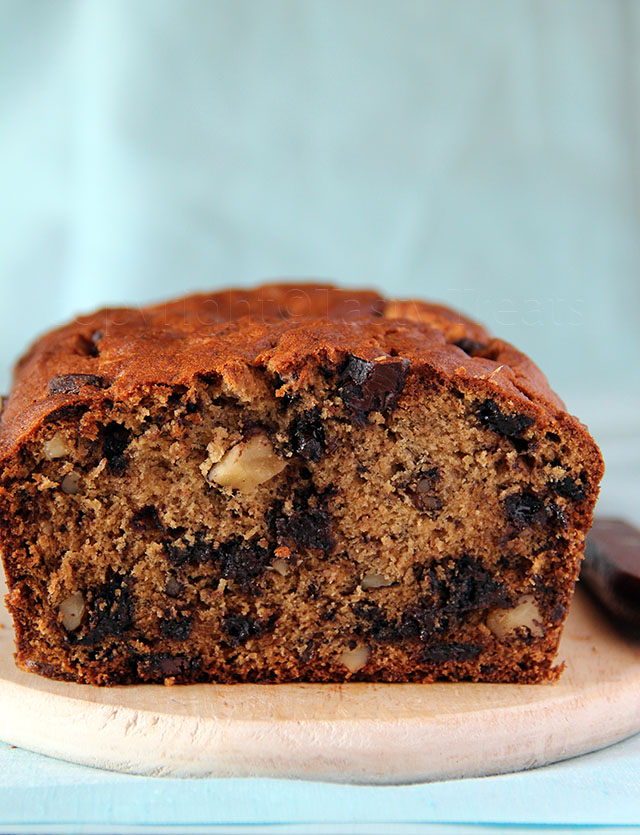
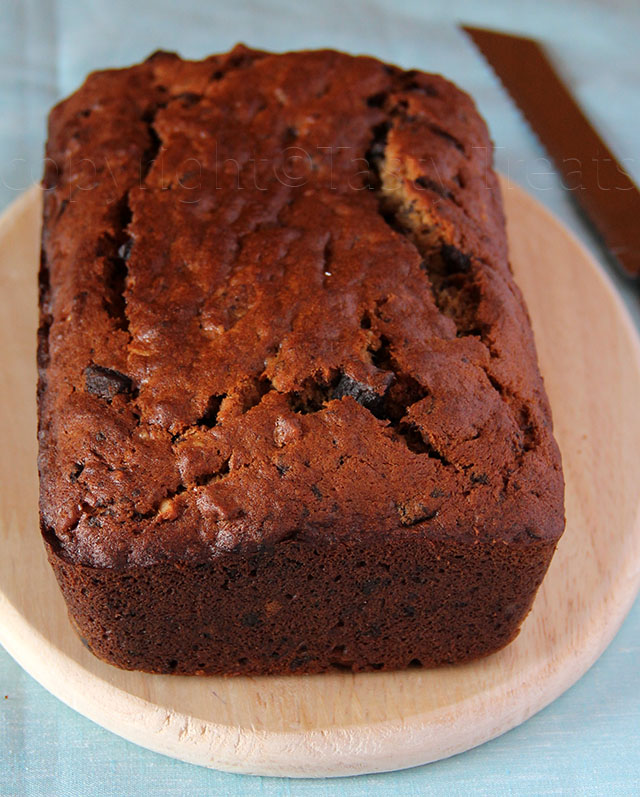
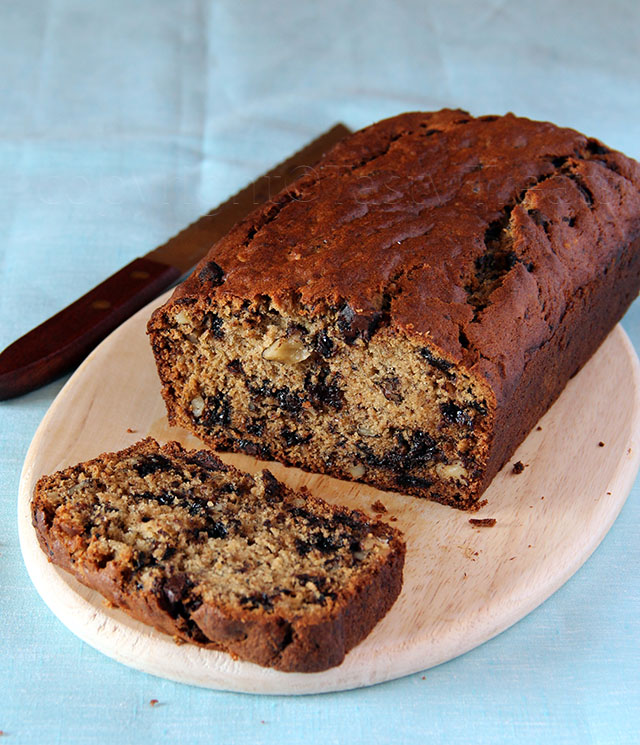
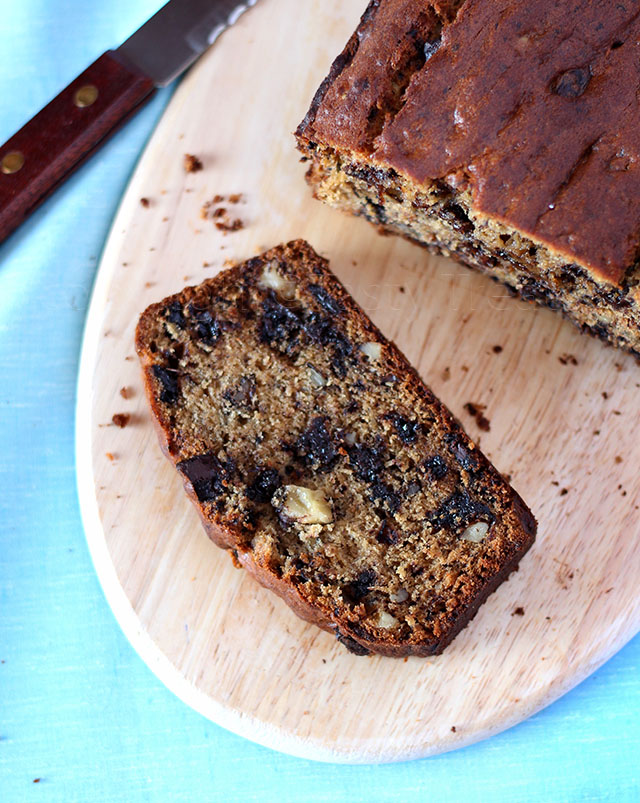
My Favorite Banana Chocolate Chip Walnut Bread


I can never eat an overripe banana, even a small black spot or mushy texture is a big no-no. So all such bananas are usually used up in shakes and I also love them caramelized.


But such overripe bananas are of course best suited for baking and I love banana bread especially when it is loaded with chocolate and nuts.


I have tried a lot of recipes in search for the perfect one and this is my favorite, the best one so far! I first baked this bread last October and its the fourth time that I've baked it again. It's just what I have been looking for and everyone who has had it has loved it! The banana flavor is prominent without being over-powering, it's super moist and it has a ton of chocolate and nuts making every bite absolutely heavenly!
Recipe from Food52.

Banana Chocolate Chip Walnut Bread


Ingredients
3 medium overripe bananas
1 cup light brown sugar (packed)
10 tbs unsalted butter, at room temperature
2 eggs
1/2 tsp vanilla extract
2 cups all purpose flour
1 tsp baking soda
1 tsp baking powder
1/4 tsp salt
1 cup semi-sweet chocolate chips
1 cup chopped walnuts

Method:
Grease and line a 9"x5" loaf pan. Preheat oven to 180C/ 350F.
Beat bananas with an electric mixer until smooth. Add the brown sugar, butter, eggs and vanilla and mix until well incorporated.
Whisk together the flour, baking soda, baking powder and salt. Add to the banana mixture and mix just until combined. Gently stir in the chocolate chips and walnuts.
Pour batter into the prepared pan and bake for 50 minutes or until a toothpick inserted comes out clean.
The top of the cake browns rather quickly, so I tented it with foil after about 25 minutes and then baked until it was done.
Let it cool completely before slicing. To get neat slices use a serrated knife and cut using a sawing motion.

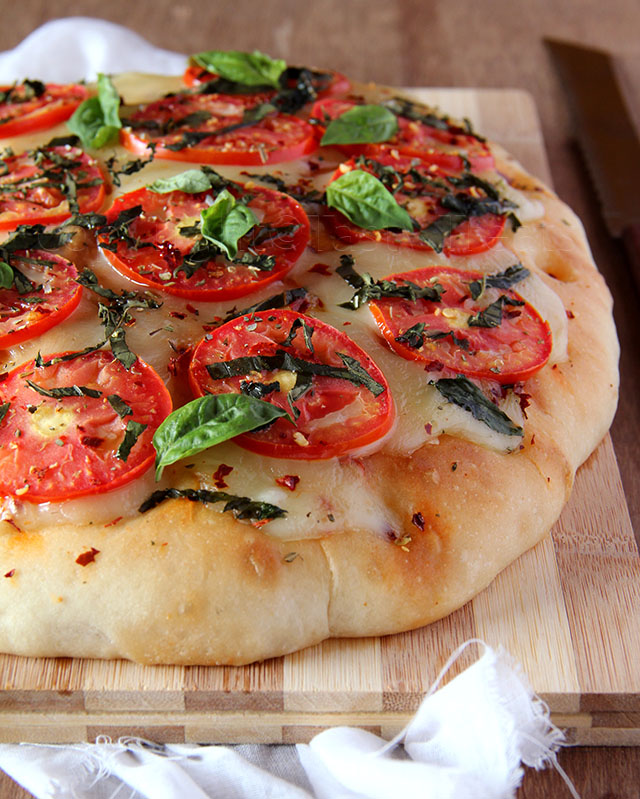
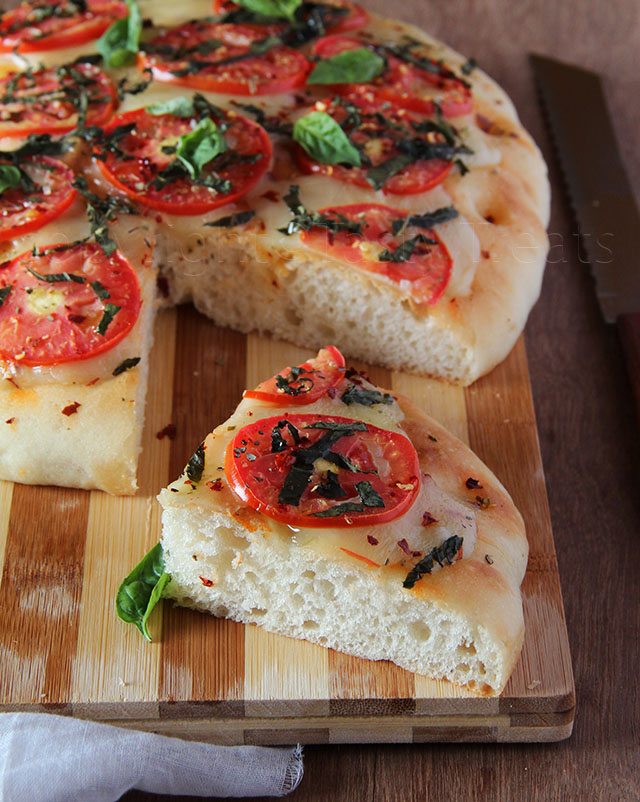
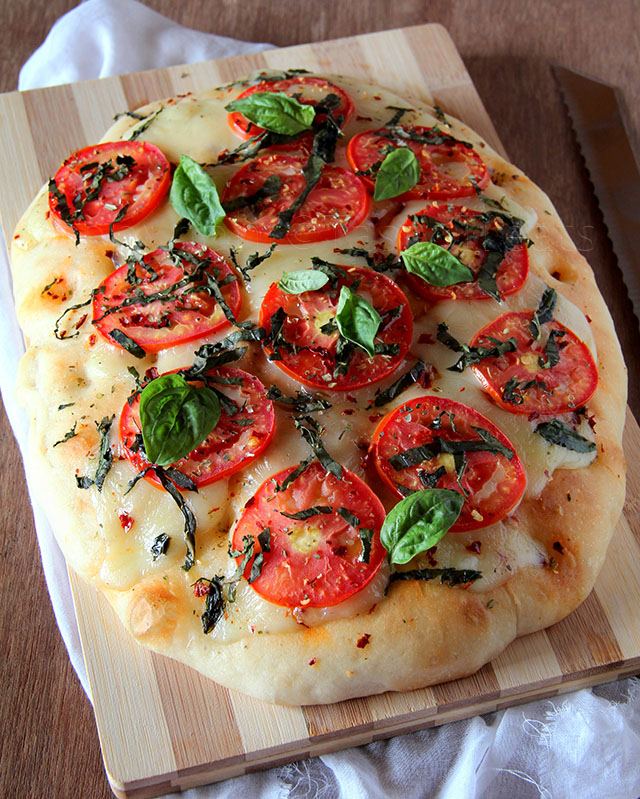
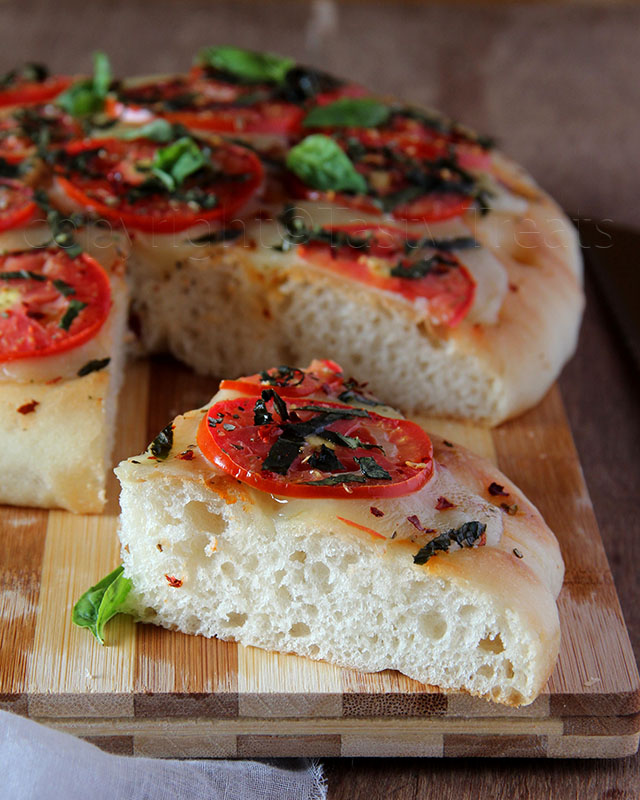
Focaccia Caprese - We Knead to Bake # 13


Though I do not have a lot of bread recipes on the blog, I do bake them often and rather enjoy the whole process.  'We knead to Bake' is a group started by Aparna last January and I've been following all the breads that they have baked through the year. I'm super excited about being a part of the group and this is the first bread of the year.


I was really happy to see the bread we would be baking, first of all focaccia is a wonderful bread and secondly this one had all my favorite things on it. I wanted to bake the bread the day it was announced, but it took me a while to find really good mozzarella and fresh basil. And for the first time I did not cut down on the oil, rather used it quite generously and it made such a difference.


This time I used a shortcut and used my Kitchen Aid to knead the dough. I can't believe I never did that before. Making bread has never been easier! 
The bread baked beautifully and it was fabulous fresh out of the oven. It was soft and spongy and the cheese all melted and gooey and the flavors were just amazing.
Recipe has been adapted by Aparna of My Diverse Kitchen from The Kitchen Whisperer.

Focaccia Caprese


Ingredients:
For the dough:
2 tsp instant yeast
1 1/2 tbs sugar
3 1/2 cups bread flour/ all purpose flour
 (I used all purpose flour and added 1 tbs vital wheat gluten to it)
1 tsp salt
1/4 cup oil (preferably olive oil)
1-1 1/2 cups warm water
A little more olive oil for brushing the dough

For the topping:
4-5 tomatoes, sliced thin
1 6-7" round piece of fresh mozzarella, cut into thin slices
1/2 cup fresh basil leaves, cut into thin strips

For the herbed oil:
1/4 cup olive oil
1 tsp dried oregano
1 tsp dried basil
1/4-1/2 tsp red chili flakes
1/2 tsp finely minced garlic/paste
salt to taste

Basil leaves for garnishing

Method:
Herbed Oil:
Put all the ingredients in a bowl and whisk them together. Keep aside.

Dough:
Take the flour, sugar, yeast, salt and oil in a bowl and mix to combine. Add 1 cup of warm water and mix with your fingers to form a dough. Add  more water if needed. Transfer the dough to a floured surface and knead until you have a soft elastic dough, that us just short of sticky. Shape into a round and place in a well oiled bowl turning the dough around so it is coated. Cover and let it rise till almost double in volume. This should take about an hour.

**I kneaded my dough in my KA mixer using the dough hook. I set it at speed 4 and mixed for about 8 minutes until I had a smooth dough. You can also use a food processor.

After the dough has risen, divide it into two equal portions. Place the dough into a greased pan and press and spread the dough with your fingers until they are approximately 11” by 7” in size. The shape does not really matter as the focaccia is a rustic bread, but try to get it evenly thick. Cover and let rise for about 20 minutes.

Generously brush the surface of the bread with olive oil and use your fingers to create evenly spaced 'dimples' all over the surface of the dough.
Bake at 210C (410F) for about 18 to 20 minutes till it is almost done and is beginning to turn golden brown. Take the Focaccia out and turn up the heat of your oven to 230C (450F).

Lightly drizzle some of the Herbed Oil over the Focaccia and then evenly arrange some slices of mozzarella all over the bread, leaving very little space between them. Top the cheese with the tomato slices and sprinkle the chopped basil over this. The topping should cover most of the surface of the bread.
Drizzle some more Herbed Oil over the topping and return the bread to the oven. Bake the Focaccia for 5 to 8 minutes or until the cheese has just melted. Remove from the oven and garnish with fresh basil leaves.
Cut the Focaccia into slices and serve while it is still hot. 
This recipe serves 4 if served alone or 6 if served with a side.

This bread is being yeastspotted!

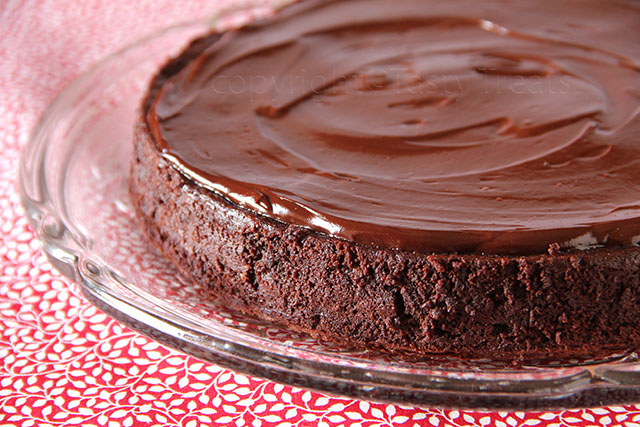
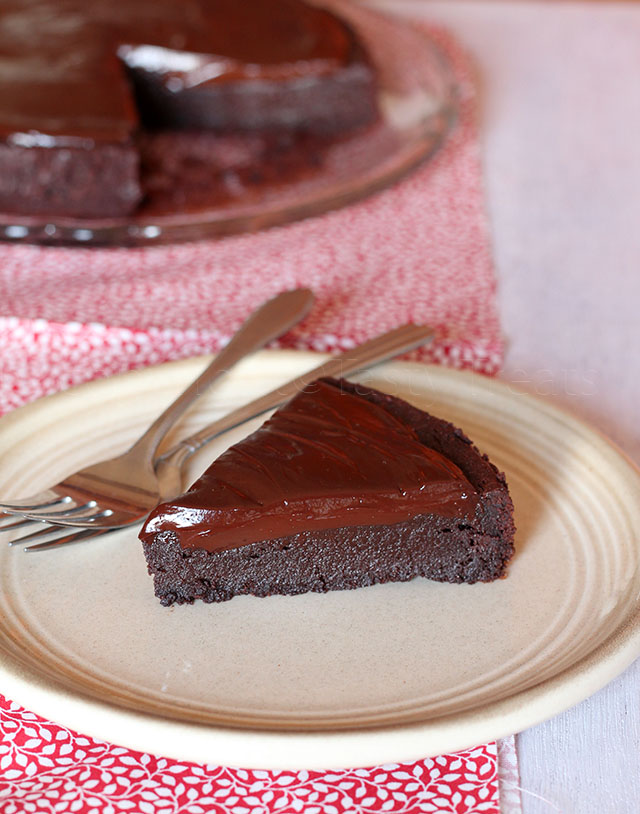
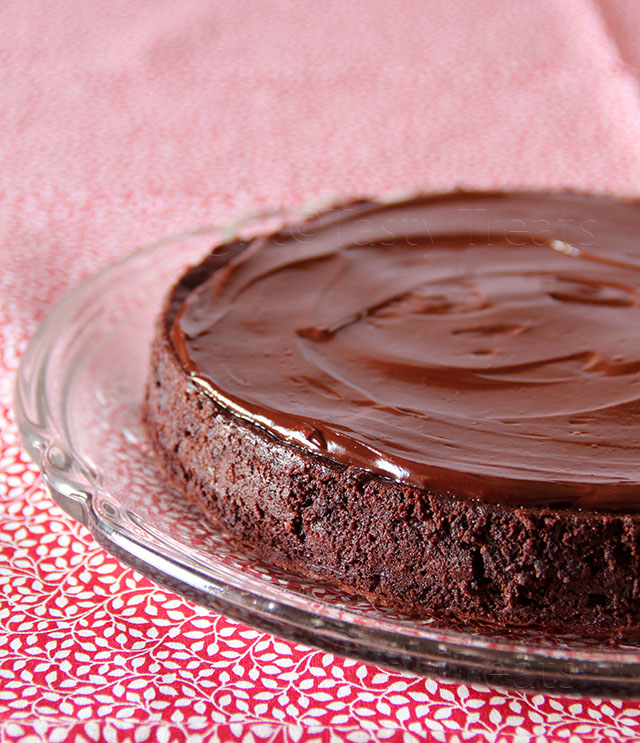
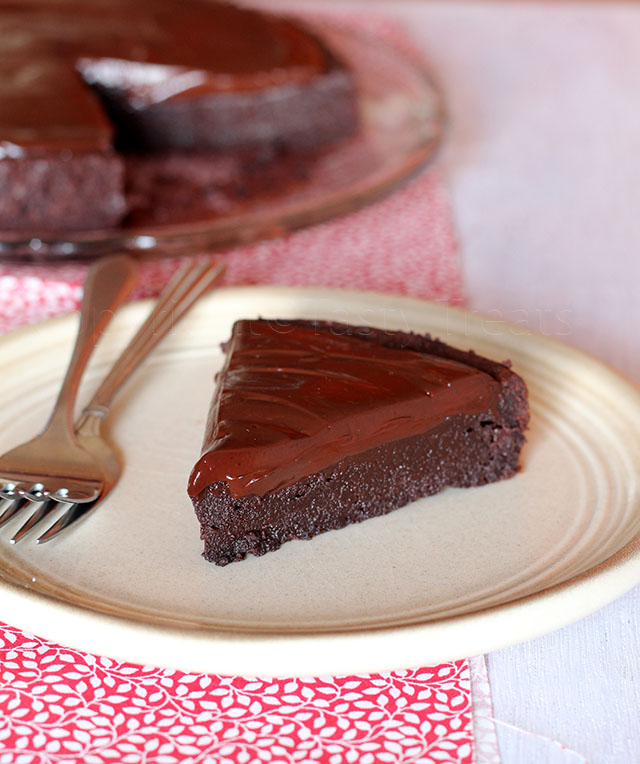
Flourless Chocolate Rum Cake


Hope you all had a very Merry Christmas and are eagerly looking forward to welcoming the new year. For the first time in years I did not bake a fruitcake this time. I just wanted something different. And when I saw the recipe for this cake, I new it would be the perfect treat.


This is one of those amazing, hassle free, one bowl desserts that can be put together in a few minutes and tastes absolutely heavenly. It is amazingly decadent, rich and intensely chocolaty and the rum in the cake takes it to a whole other level.


The original recipe has a fudge icing with rum in it. I topped the cake with ganache and skipped adding any rum to it, as I knew Anushka would want to lick the ganache bowl clean:). Moreover as much as I love the flavor of alcohol in desserts, even a little too much makes me tired and sleepy. But if you can take it, I'd say got for it.
To make it alcohol free, simple substitute the rum with some coffee. I can only imagine how good that would be!!
Recipe from Pastry Affair.

Flourless Chocolate Rum Cake


Ingredients:
 6 ounces semi sweet chocolate, chopped
1/2 cup butter
1/2 cup sugar
4 large eggs
1 1/2 tsp vanilla extract
1/2 cup cocoa powder, sifted
1/3 cup rum

Method:
Grease and line an 8" round pan. Preheat oven to 190 C/ 375F.
Melt the chocolate and butter over a double boiler, stirring until smooth. Remove from heat and mix in the sugar. Make sure the mixture is only slightly warm and whisk in the eggs one at a time, mixing well until smooth after each addition.
Stir in the vanilla extract, cocoa powder and rum and mix until smooth. Pour into the prepared pan and bake for 25-30 minutes or until a skewer comes out with a few moist crumbs. Take care to not over bake the cake.
Cool in the pan for 5 minutes and invert onto a platter. Cool completely and top with the ganache.

Ganache


Ingredients:
1/2 cup cream
4 ounce dark chocolate, chopped
1 tbs rum (optional)

Method:
Heat the cream just until you see bubbles around the edges. Pour over the chocolate and let it stand for about 1 minute.
Stir until smooth. Stir in the rum if using and once cool spread over the cake.

Melt 'n' Mix Custard Shortbread


I usually shy away from recipes calling for a lot of butter, but then it is the season for sharing and gifting so why not! These shortbread cookies are an indulgence...soft, buttery, melt-in-your mouth and just lightly sweetened. I also love the flavor of custard powder and the light yellow color it adds to the cookies.
Recipe from here, adapted from The Australian Women's Weekly.

Custard Shortbread


Ingredients:
250gms unsalted butter
35gms icing/ confectioners' sugar
55gms castor sugar
40gms custard powder
360gms all purpose flour
pinch of salt
sugar for sprinkling

Method:
Line and grease a 7"x11" pan. Preheat the oven to 180 C/ 350 F.
Melt the butter over low heat and keep aside to cool slightly.Sift the icing sugar and custard powder into a bowl and mix in the sugar.Add the melted butter and beat mixture until thick and creamy. Add sifted flour and salt and mix gently until combined.
Press the mixture into the prepared pan evenly and level the surface. Mark the dough into fingers and prick each finger decoratively with a fork and sprinkle some sugar on top if desired.
Bake for 25-30 minutes until lightly golden. Cut into fingers while still warm and cool in the pan.
If you like your cookies to be crispier, just bake for another 15 minutes or so.

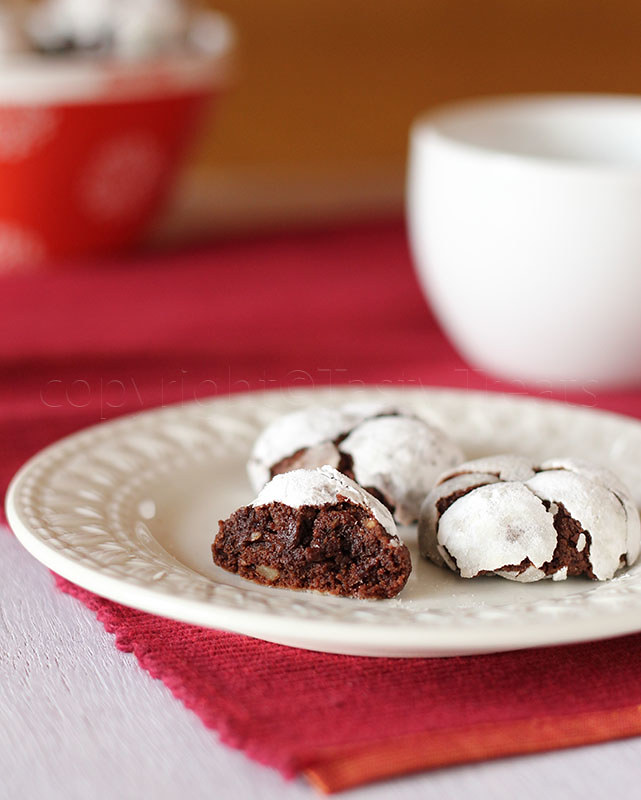
Chocolate Crinkle Cookies...Holiday Baking


Anushka started school last week and that leaves me with a couple of hours each day to do all those things that are otherwise impossible with an hyperactive kid at home. My to-do list just keeps getting longer and now maybe I could catch up with some of them.


I am also looking forward to bake some more. Now that Christmas is just around the corner, I have the perfect excuse to try some cookie recipes that I've had bookmarked forever. Moreover Anushka is turning out be quite the cookie lover and that's gotten me really excited.
I have made these cookies before and they are an absolute treat. Not only are they pretty to look at, they taste heavenly too. Bake them right and they are amazingly fudgy and chocolaty, like the perfect brownie. What I love about this recipe is that there is no butter involved and the ingredients have to be just mixed quickly in one bowl and the dough tastes amazing too.


The one change I made was to use substitute some of the bittersweet chocolate with unsweetened chocolate as I remember finding them a little too sweet for my tastes. With this change though they were just right. Recipe from here.

Chocolate Crinkle Cookies


Ingredients:
1 cup bittersweet chocolate, chopped (I used 1/3 cup unsweetened chocolate)
1 cup brown sugar, packed
1/3 cup oil
2 eggs
1 tsp vanilla extract
1 cup flour
1 tsp baking powder
1/4 tsp salt
1/2 cup walnuts, chopped (optional, but highly recommended
1/2 cup powdered sugar

Method:
Melt the chocolate over a double boiler. 
Add the sugar and oil and mix well.
Make sure that the mixture is almost at room temperature and add the eggs one at a time, whisking well after after each addition.
Add the vanilla.
Combine flour, baking powder and salt. Add to the chocolate mixture. Stir in nuts.
Cover and chill the dough for two hours or until firm enough to roll.Preheat the oven to 175C /350F.
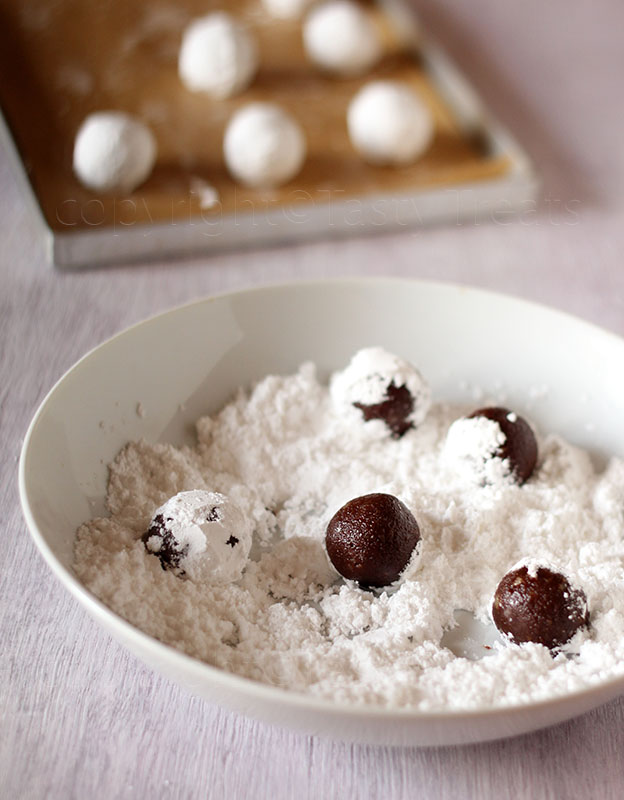
Form into 1" balls and roll in the powdered sugar until completely coated. 
Place in a parchment covered cookie sheet about an inch apart and bake for 8-10 minutes.
Cool on wire racks. 
I baked my cookies for 8 minutes, they will be soft when you get them out of the oven, but wait for  a few seconds and they will be firm enough to transfer them to the rack and will get firmer when completely cool.
Please, do not overbake the cookies. They look the best on the day they are baked, but they taste just as great for a couple of days more.

Healthy Cardamom Tea Cake


It has been a month since we moved back to India. There are hundreds of things I will miss about our life back in the US, but it's wonderful to be home and meet up with family and friends. Most of all I love to see Anushka playing with and getting pampered by her grandparents. We are undecided as to where we will be settling and I've been shuttling between by in-laws and parents homes and living out of suitcases and it still feels like a vacation.
As far as blogging goes though, I'm in a rut and it took a lot of self-motivation to write up this post. I miss my boards and all the props that I had to leave behind and of course the huge oven in our apartment. Although I haven't cooked anything new in a while I have been baking quiet a lot and am finally getting used to the old O.T.G at my mom's place.


This cake, adapted from Cook Republic is the first one I baked since coming here. I love the simple ingredients and the one bowl mixing method. The batter was ready in no time and while the cake bakes, the house smells heavenly because of the cardamom. It was impossible to wait until the cake cooled and we sliced it minutes after it was out of the oven. It had just the right amount of sweetness, great texture and amazing flavor, we loved it.

Healthy Cardamom Teacake


Ingredients:
1 1/2 cups self-raising flour
1/2 whole wheat flour
1 1/2 tsp cardamom powder
1/4 tsp cinnamon powder
a pinch of salt
1 cup castor sugar
3 eggs, well beaten
1 cup rice bran oil
1/2 cup milk
icing sugar, for dusting (optional)

Method:
Preheat oven to 350F / 180C. Liberally grease an 8" round pan and dust with flour.
Sift together flours, cardamom, cinnamom and salt.
Stir in sugar. Whisk together the eggs, oil and milk until combined. Spoon mixture into prepared pan.
Bake for 40-50 minutes until golden and cooked through.
Turn out onto a wire rack to cool, dust with icing sugar, if using and serve.

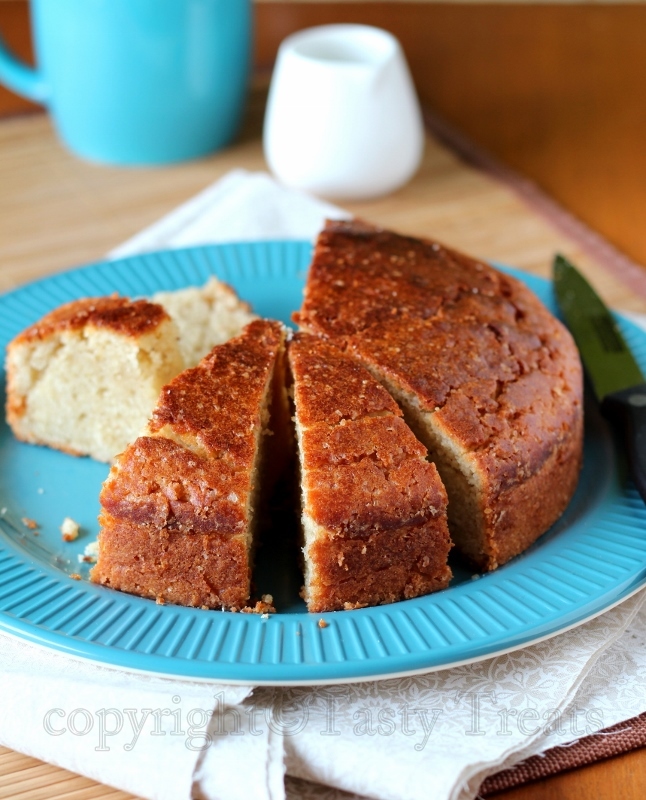
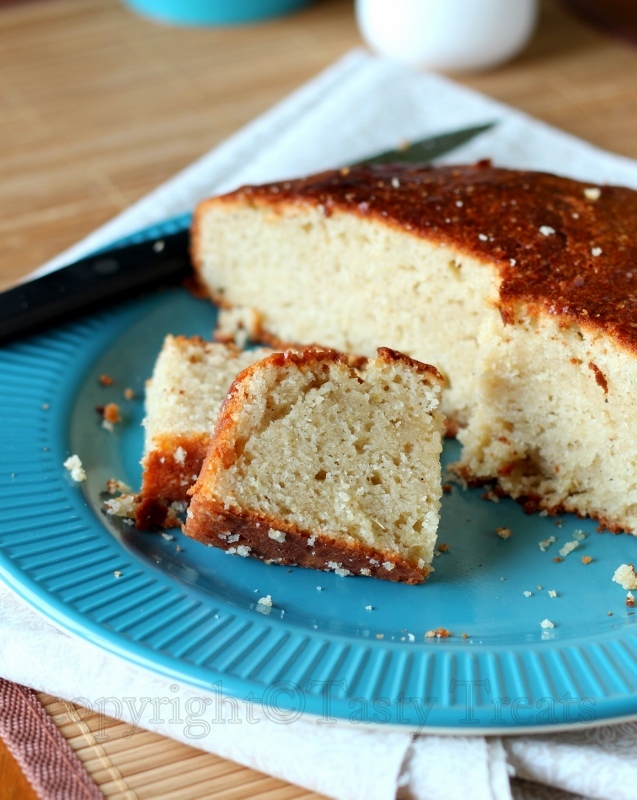
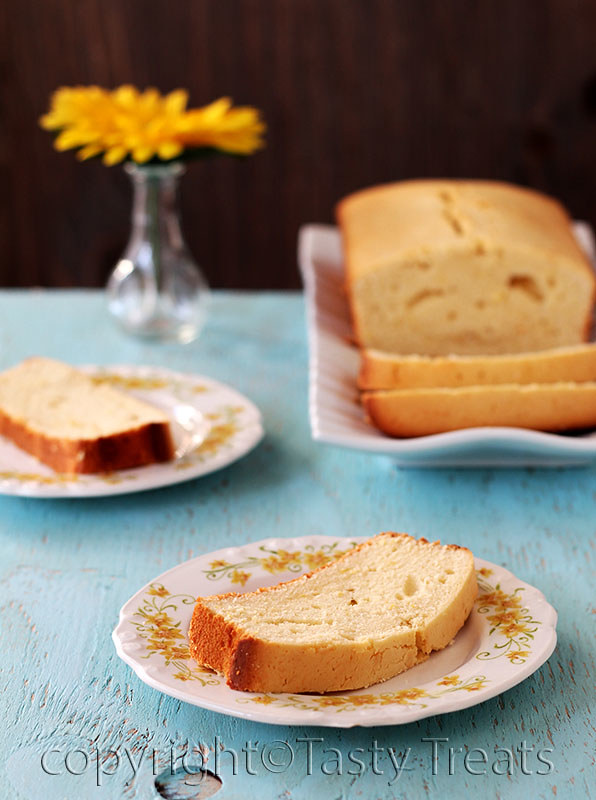
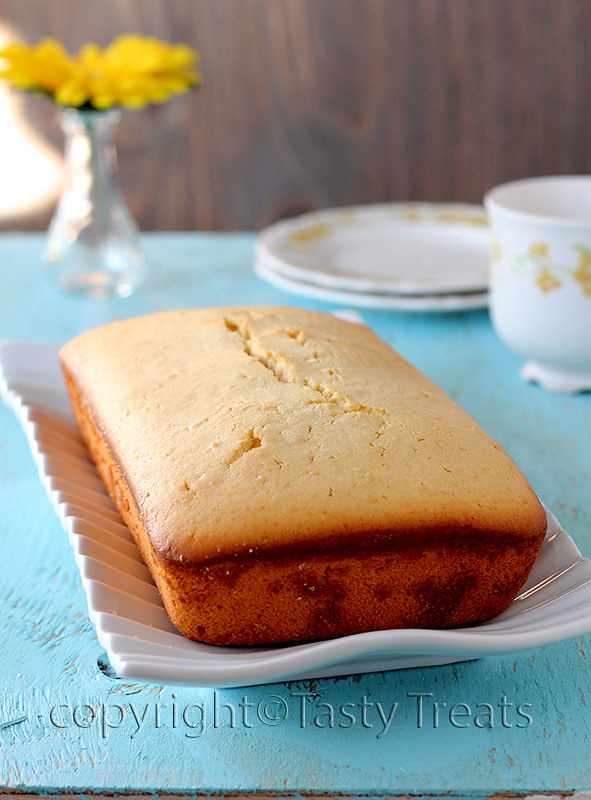
Cold-Oven Cream Cheese Pound Cake


We were cutting a melon for our snack last evening, while craving for a good slice of cake instead and we got around reminiscing about those days when we wouldn't give a damn about what we ate. We were in Hyderabad for a year after we got married, it was a new place with not many friends. Once Manoj left for work my brand new oven was the best company I had on most days. I baked cakes or muffins every other day and while I loved sharing my bakes with my new neighbors, there were those rare occasions when I would finish an entire cake all by myself and then I would bake one more before Manoj got home. We always had cake at home and we never gave a thought to all the sugar, flour and butter we were having daily.


Ofcourse now its all I can think about as the side effects are a little too clearly visible around our waistlines. 
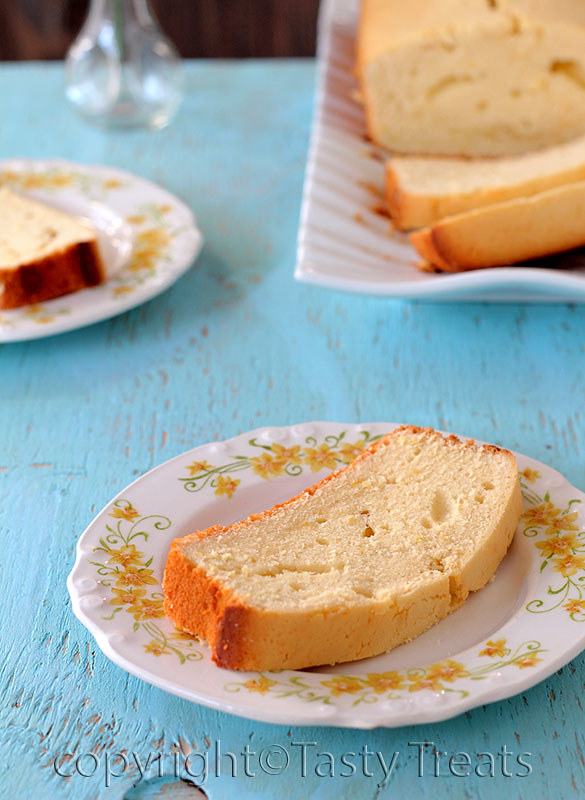
I eagerly wait for an opportunity to bake now, friends coming over or a party at Anushka's school or at work. I had baked this particular cake for a snack party at Anushka's school a while back and it was heavenly. The cream cheese imparts an amazing velvety texture to the cake and a little tanginess that's just perfect.
It's from one of my favorite books, Cake Keeper Cakes by Lauren Chattman. I googled the recipe before I tried it and it was a good thing too because I found a lot of  reviews that suggested reducing the sugar. I reduced it considerably and it was still sweet, but just the right amount.
Note:
I divided the cake batter among two loaf pans and there was not enough and thats the reason it baked flat. Its best to use a bundt pan, it rises beautifully and looks great.

Cold - Oven Cream Cheese Pound Cake


Ingredients:
3 cups cake flour
1 1/2 tsp baking powder
1 tsp salt
1 cup (2 sticks) unsalted butter, softened
8 oz cream cheese, softened
1 1/2 cups sugar (original recipe calls for 2 1/2 cups)
6 eggs (room temperature)
1 tbs pure vanilla extract
1 1/2 tbs grated fresh ginger
1 tbs grated lemon zest


Method:
Adjust the oven rack to the lower-middle position. Grease a 12-cup bundt pan and dust with flour. Combine flour, baking powder and salt in a medium mixing bowl.
Combine the butter, cream cheese and sugar in a large mixing bowl and cream with an electric mixer on medium high speed until fluffy, about 3 minutes, scraping down the sides of the bowl if necessary.
With the mixer on medium speed, add the eggs one at a time, scraping down the sides of the bowl after each addition. Beat in the vanilla, ginger and lemon zest.
Turn the mixer to low speed and add the flour mixture, 1/2 cup at a time, scraping down the sides of the bowl after each addition. After the last addition, mix for 30 seconds on medium speed.
Place the cake in a cold oven. Turn the oven to 325F and bake, without opening the door, until the cake is golden brown and a toothpick inserted in the center comes out clean, 65-80 minutes.
Cool the cake in the pan for 15 minutes, then invert it onto rack. Cool completely before slicing and serving.
Store uneaten cake in a cake keeper, or wrapped in plastic at room temperature for upto 3 days.

Note:
I divided the cake batter among two loaf pans and there was not enough and thats the reason it baked flat. Its best to use a bundt pan, it rises beautifully and looks great or use smaller loaf pans.

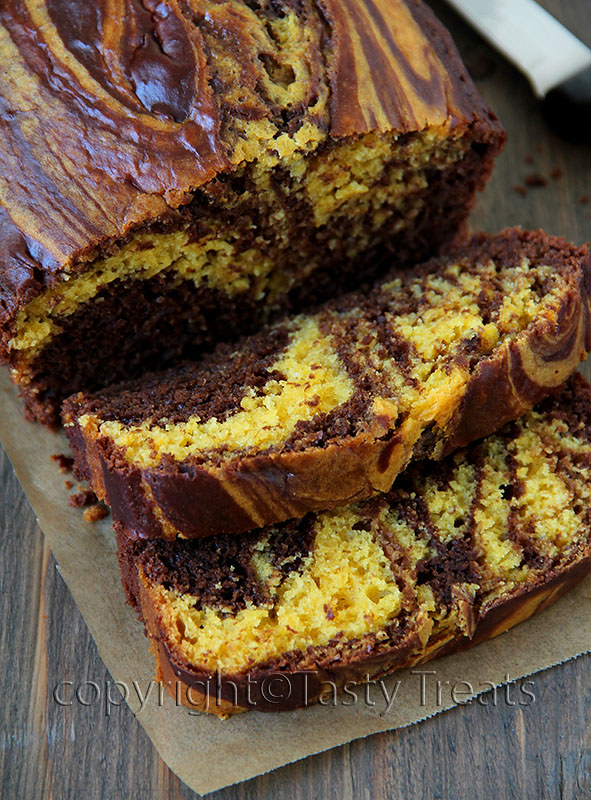
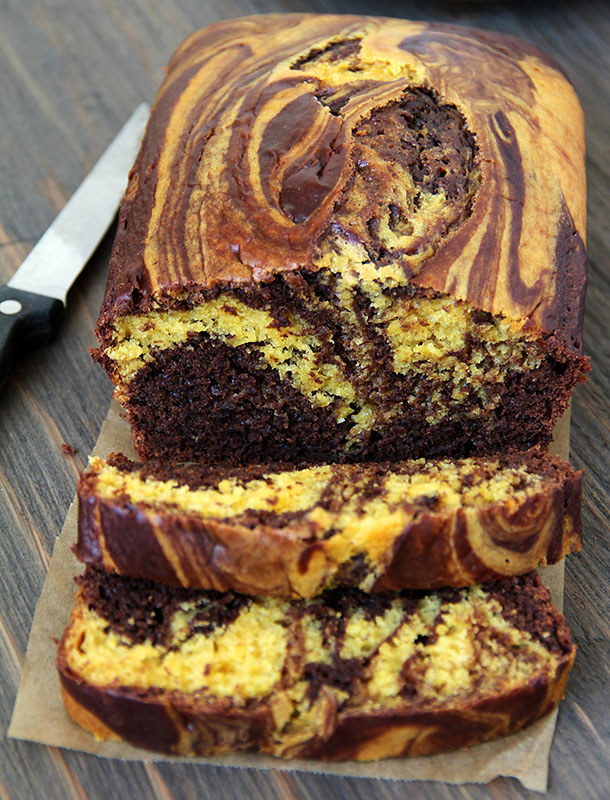
Eggless Chocolate Mango Marble Cake


Chocolate and mango are on the top of my list of favorite flavors and they pair up beautifully too. This was the second dish we baked as part of the Homebaker's Challenge and the recipe was chosen by Sangeetha of Spicy Treats.


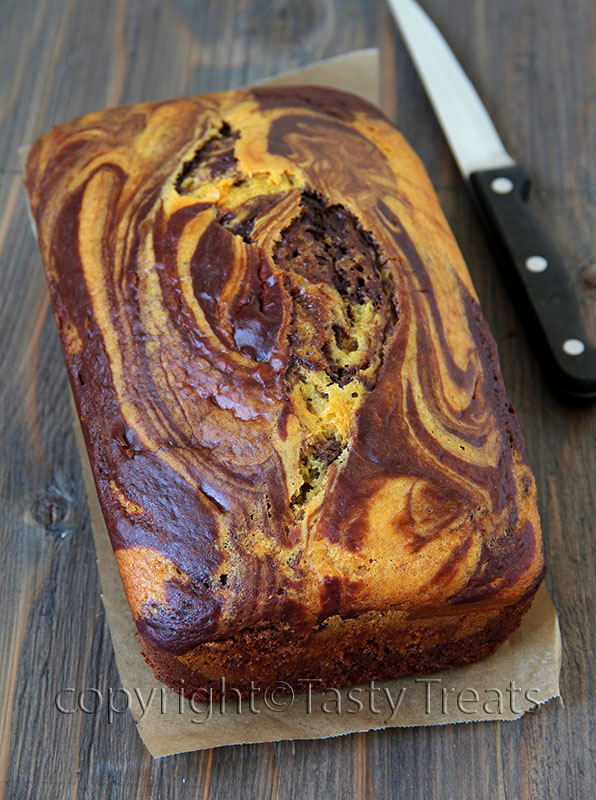
We had two recipes to chose from, with or without eggs and I went eggless this time. I usually prefer baking with eggs but this recipe did not disappoint. The cake was moist and the  two flavors really stood out. Like most eggless cakes this one too had a dense crumb, but the taste more that compensated for it.
The only change I made was adding a little bit of coffee to the chocolate batter and that really helped to enhance the chocolate flavor.

Chocolate Mango Marble Loaf


Ingredients:
2 cups all purpose flour
11/2 tsps baking powder
1/2 tsp baking soda
1/4 tsp salt
1/4 cup cocoa powder
3/4 cup sugar
5 tbsp oil
1 tsp vanilla extract
1 cup mango pulp
1/4 milk
1/4 cup buttermilk

Method:
Preheat the oven to 350F/ 180C. Grease and line a 9" x 5" loaf pan.
Mix the cocoa powder with 3-4 tbs of warm water and keep aside.
In a large bowl whisk together flour, baking powder, baking soda and salt until well combined.
In another bowl mix together the sugar, oil, vanilla, mango pulp, milk and buttermilk.
Add the wet mixture to the dry ingredients and fold gently until well combined.
Divide the batter into two and gently fold in the cocoa mixture into one half.
Pour the two batters alternately into the prepared pan and run a knife through the batter to create a marbled effect.
Bake for 50 - 55 minutes or until done.

Pizza from Scratch with Onions, Bell Pepper, Chicken Sausage and Corn


It is so surprising that I've never posted a pizza recipe here, because it's something we make so regularly. Although we love eating out, when it comes to pizza especially, home made is just so much better.


I love experimenting with different crusts, sauces and toppings, there are so many options. The crusts don't always turn out perfect, but cheese (just like chocolate), makes makes everything taste good.


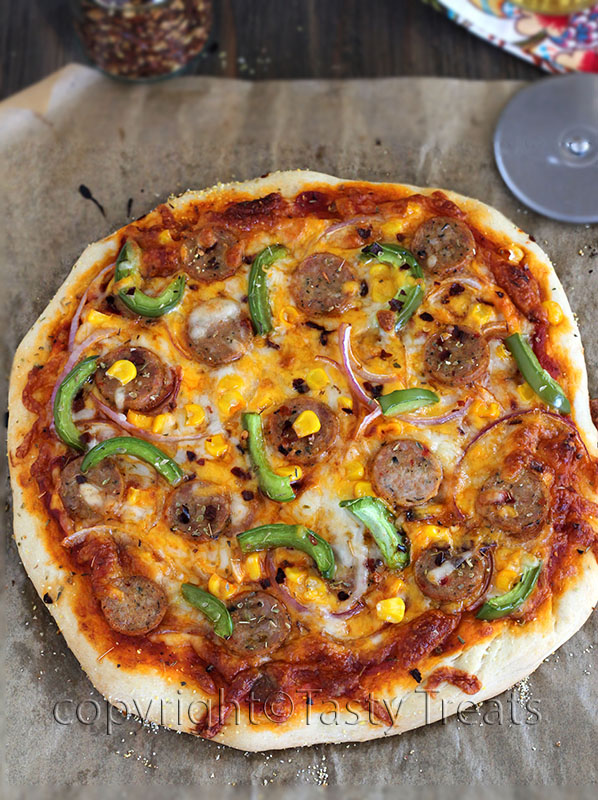
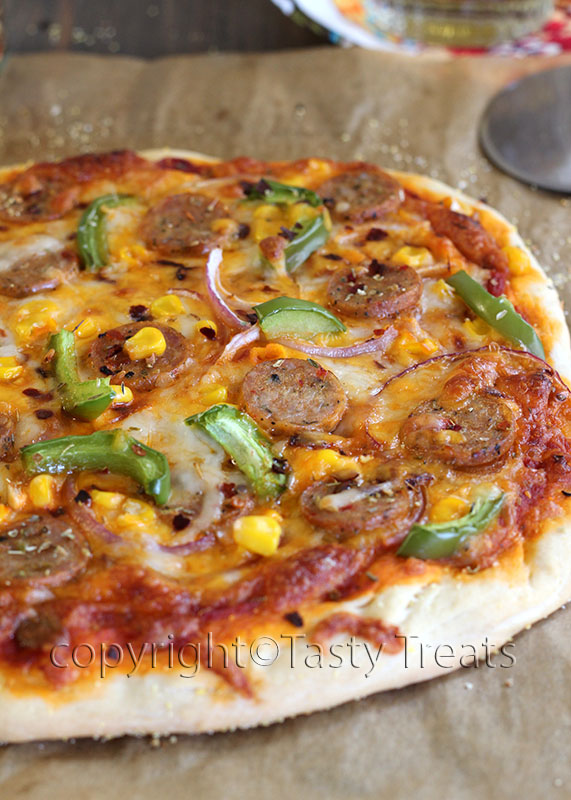
Home Bakers Challenge is a new group started by Priya of Priya's Versatile Recipes and we all baked Pizza  for our first challenge.The recipe below is by Giada Laurentis and the only change I made was substitute half the flour with wheat flour. The crust baked perfectly and it had great texture and was not at all soggy. Went along with a simple marinara sauce and some of our favorite toppings and cheeses. 

Pizza from Scratch


Dough:
Ingredients:
1/2 cup warm water (105-110 degrees F)
2 tsps active dry yeast
1 cup all purpose flour
1 cup whole wheat flour
1 tsp salt
3 tbs olive oil

Pizza Sauce ( I used the marinara sauce that I make often, recipe here )
Cheese, Mozzarella and Sharp Cheddar

Toppings I used:
Onion
Capsicum
Chicken Sausage
Corn kernels

Method:
Mix the warm water and yeast in a small bowl and let stand for about 5 minutes until the yeast dissolves.
Mix the flour and salt in a bowl. Add the olive oil and stir it in with your fingers. Add the yeast mixture and mix until the dough comes together.
Turn out into a lightly floured surface and knead for couple of minutes until smooth.
Transfer the dough to a large oiled bowl and turn the dough to coat with oil. Cover the bowl with a plastic wrap and set aside in a warm area until it doubles in volume, about an hour.
Punch the dough and divide into two equal balls.( Use the dough immediately or store refrigerated in an air-tight container for one day).
Preheat oven to 450 degrees F. Keep your pizza stone or a rimless baking sheet inside the oven as it preheats. Sprinkle cornmeal over a piece of parchment paper. Place the dough on the parchment paper and roll out or spread the dough with your fingers to your desired thickness, I like a thin crust pizza.
Brush the dough lightly with some olive oil.
Spread some pizza sauce over the dough and then sprinkle the cheese over the sauce, as much as you like.
Top with your favorite toppings and sprinkle some oregano and chili flakes and salt.
Take the pizza stone or baking sheet out of the oven and transfer the pizza along with the parchment paper onto it.
Bake the pizza until the crusts are crisp and brown on the bottom and the cheese has melted and is bubbly.


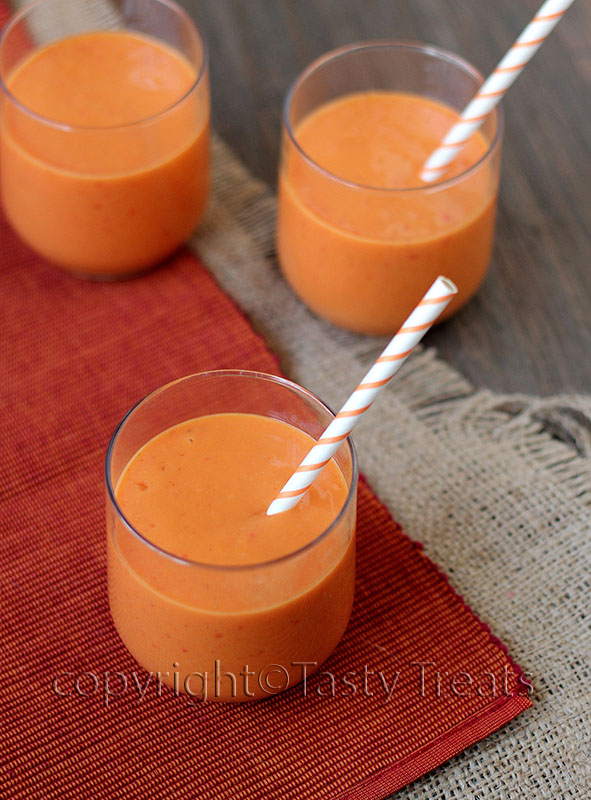
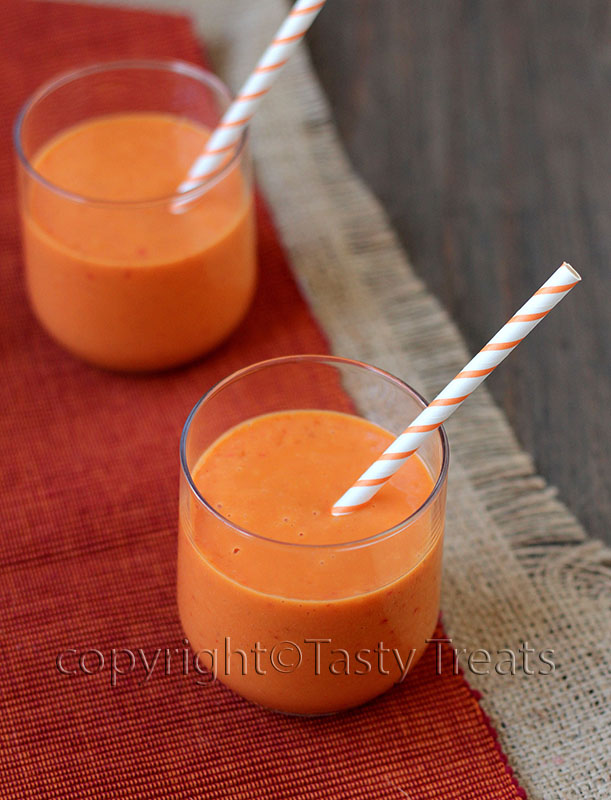
Mango Strawberry Carrot Smoothie


I have been making smoothies everyday for the last couple of years. Anushka and I, have a smoothie daily for our  mid morning snack and it's the only thing she will have without a fuss.

Smoothies are the perfect way to include a good serving of fruits and vegetables in your daily diet, especially for kids. They are healthy, refreshing and so filling. Use ripe, sweet fruits and fresh vegetables and mix and match them to get various flavors, colors and textures. Makes a wonderful healthy dessert too.


I always try to add vegetables to my smoothies, about a third of the amount of fruits. I have tried a lot of combinations and this is one of my favorites. Use tender sweet carrots and sweet mangoes and strawberries and you'll have a great tasting drink.

Mango Strawberry Carrot Smoothie


Ingredients:
pulp of two mangoes
8 strawberries, hulled and chopped
1 big carrot, washed and peeled and chopped
1/2 cup plain yogurt
sugar/honey/ any other sweetener as needed (I usually avoid this)
cold water as needed

Method:
Take all the ingredients in a blender and blend until smooth. Add sugar if needed and add enough water to get the required consistency and blend again. Serve immediately.

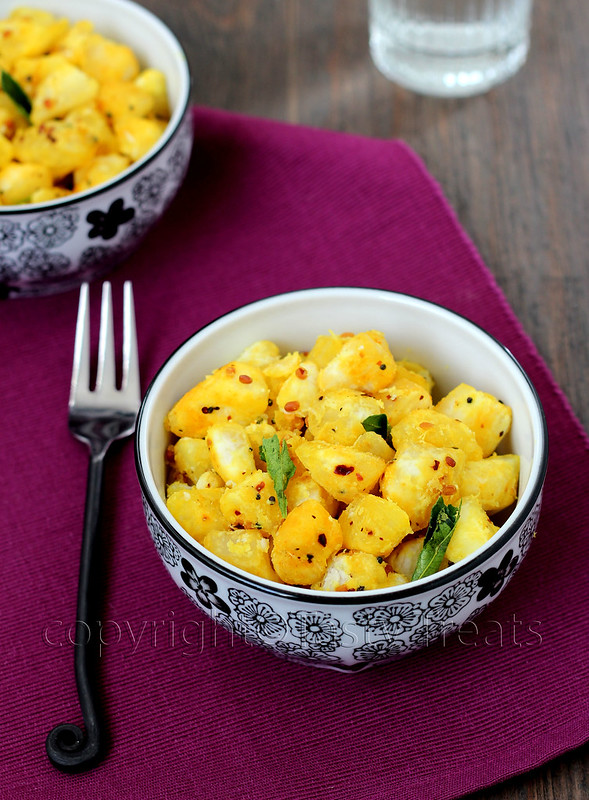
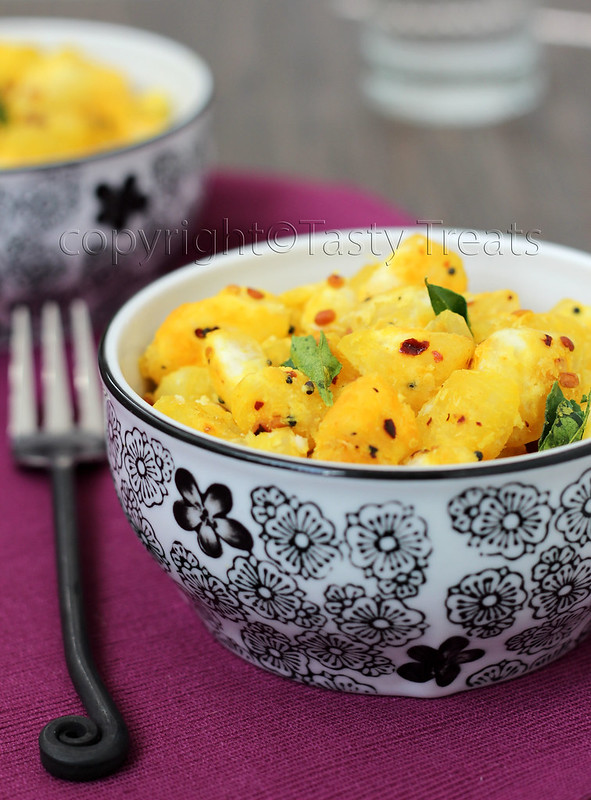
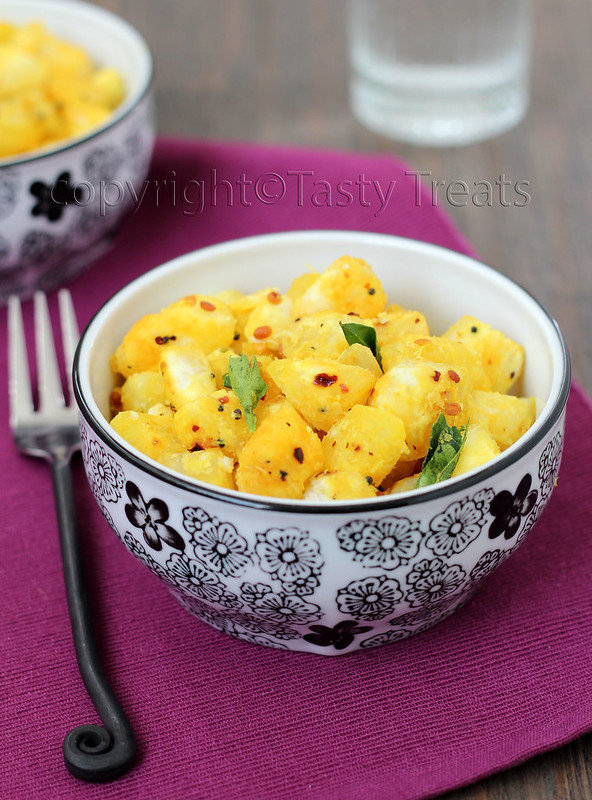
Kappa Masala - Spiced Tapioca/ Yucca Root


The members of Kerala Kitchen, a facebook group have decided to cook a traditional dish from Kerala every month. I loved the idea as there are a lot of dishes I would love to make and whats better than a group of fellow enthusiasts cooking together. Nags of Edible Garden selected Kappa Masala as the recipe for this month and its one I  enjoy any time of day.

I make kappa atleast a couple of times every month, but its usually just steamed for breakfast or snack times.  And if I do make a fish curry I make sure to make a little puzhukku, my favorite! Though I have eaten this kappa masala a few times, this was the first time I made it myself. I actually made it thrice this month, the first two times it was almost over before I could take pictures, but the third time I was determined! It was delicious and made the perfect tea time snack.

Kappa Masala


Ingredients:
500 gms kappa, tapioca, peeled and cut into cubes
1 tbs coconut oil
1/2 tsp mustard seeds
1 tsp urad dal
1 sprig curry leaves
2 big cloves of garlic, crushed
3/4 tsp dried red chili flakes or use while chilies to taste and crush with the garlic
1/4 tsp turmeric powder
salt to taste


Method:
Take the kappa in a large pot and add enough water to cover it well and some salt and cook until the kappa is tender but holds its shape. Drain the water well.
Heat the oil in a pan and splutter the mustard seeds. Add the urad dal and fry until browned. Add the curry leaves, garlic, red chili flakes and turmeric and fry for a few seconds, take care not to burn the garlic
Add the boiled kappa and salt of needed and stir until everything is well combined and the kappa is evenly coated with the spice mixture.
Remove from heat and serve hot.